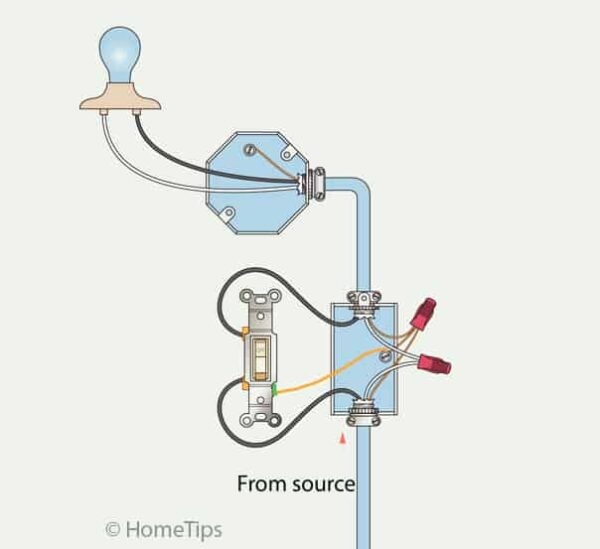
When it comes to installing or replacing a light switch, understanding the wiring diagram is crucial. A single pole light switch is one of the most common types of light switches found in homes. It has two brass screws for the hot wires and a green screw for the ground wire. With the right knowledge and tools, you can easily wire a single pole light switch yourself.
Before starting any electrical work, always remember to turn off the power to the circuit at the breaker box. This will ensure your safety while working on the wiring. It’s also important to have the necessary tools such as a screwdriver, wire stripper, and voltage tester handy.
 How To Wire Single Pole Light Switch With Pilot Light Terry Love (terrylove.com)
Begin by removing the cover plate of the existing switch and unscrewing the switch from the electrical box. You will see three wires connected to the switch: a black (hot) wire, a white (neutral) wire, and a bare copper (ground) wire. Take note of how these wires are connected before disconnecting them.
Next, connect the black wire to one of the brass screws on the new single pole light switch and the white wire to the other brass screw. The bare copper wire is then connected to the green screw for the ground. Make sure to tighten the screws securely to ensure proper connections.
Once all the wires are connected, carefully tuck them back into the electrical box and screw the new switch in place. Replace the cover plate and turn the power back on at the breaker box. Test the switch to ensure it is working properly by turning the light on and off.
With these simple steps, you can easily wire a single pole light switch in your home. However, if you are unsure or uncomfortable working with electrical wiring, it is always best to consult a professional electrician for assistance.
Remember, safety should always be your top priority when working with electricity. By following the wiring diagram and taking necessary precautions, you can successfully install a single pole light switch in your home.