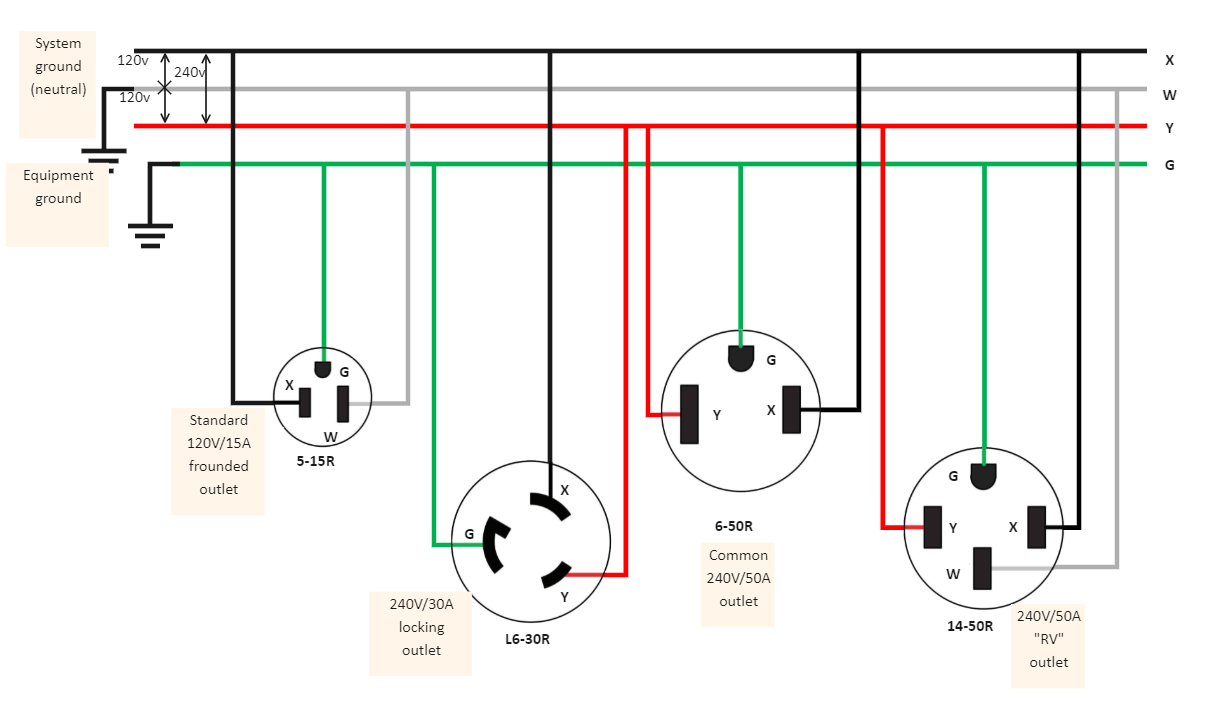
When it comes to wiring a 3-prong 240v plug, it is important to follow the correct diagram to ensure proper installation and safety. This type of plug is commonly used for large appliances such as dryers, ovens, and water heaters that require a higher voltage. By understanding the wiring diagram, you can easily connect the plug to the appropriate outlet.
Before starting the wiring process, make sure to turn off the power to the outlet to avoid any accidents. It is also recommended to use a voltage tester to double-check that the outlet is not live. Safety should always be a top priority when working with electricity.
 How To Wire A 3 Prong 240V Plug A Step By Step Guide (datavisualexpert.com)
First, you will need to identify the three wires inside the cable of the 3-prong plug: the hot wire, the neutral wire, and the ground wire. The hot wire is usually black or red, the neutral wire is white, and the ground wire is green or bare copper. Each wire has a specific connection point in the plug that must be adhered to for proper function.
Next, you will connect the wires to the appropriate terminals in the plug. The hot wire should be connected to the brass terminal, the neutral wire to the silver terminal, and the ground wire to the green terminal. Make sure to tighten the screws securely to ensure a strong connection.
Once all the wires are securely connected, carefully insert the plug into the outlet and secure it in place. Turn the power back on and test the appliance to ensure that it is receiving the correct voltage. If everything is working properly, you have successfully wired a 3-prong 240v plug.
In conclusion, understanding the wiring diagram for a 3-prong 240v plug is essential for proper installation and safety. By following the correct steps and connecting the wires to the appropriate terminals, you can ensure that your large appliances receive the necessary voltage to function correctly. Remember to always prioritize safety when working with electricity to prevent accidents and injuries.