One phase motors are commonly used in various applications such as household appliances, fans, and pumps. Understanding the wiring diagram of a 1 phase motor is essential for proper installation and maintenance. By following the correct wiring diagram, you can ensure the motor operates efficiently and safely.
When wiring a 1 phase motor, it is important to identify the different terminals and their functions. The wiring diagram typically includes labels for the main terminal connections such as the start winding, run winding, and capacitor. It is crucial to follow the diagram carefully to avoid any wiring errors that could potentially damage the motor.
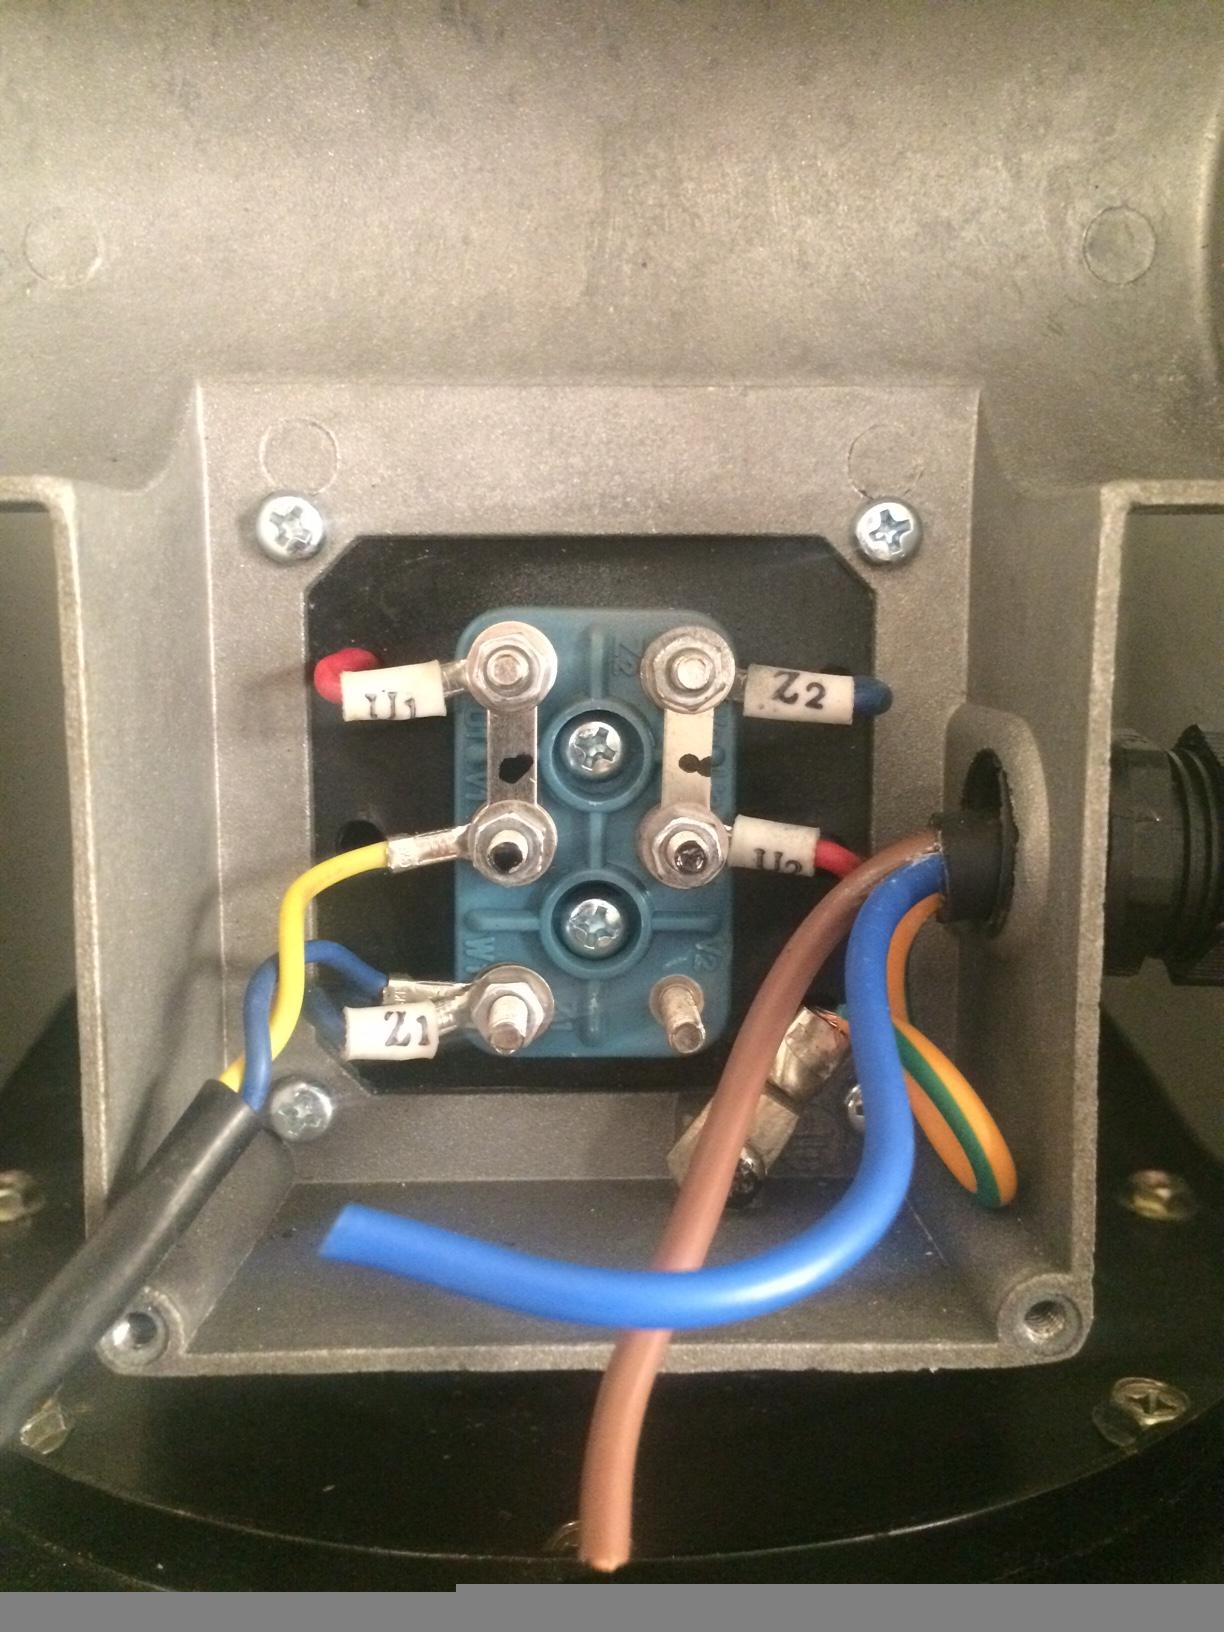
 Wiring Diagram 230v Single Phase Motor Wiring Diagram (www.organised-sound.com)
Start by identifying the main power supply wires and connecting them to the corresponding terminals on the motor. The start winding and run winding should also be connected to the appropriate terminals based on the wiring diagram. Additionally, if the motor requires a capacitor for starting or running, make sure to connect it according to the diagram.
Once all the connections are made, double-check the wiring to ensure everything is properly connected and secured. It is also recommended to test the motor after installation to verify that it is functioning correctly. If there are any issues, refer back to the wiring diagram to troubleshoot and resolve the problem.
Regular maintenance and inspection of the motor’s wiring is important to prevent any potential hazards or malfunctions. By following the correct wiring diagram and ensuring proper installation, you can prolong the lifespan of the motor and avoid costly repairs in the future.
In conclusion, understanding the wiring diagram of a 1 phase motor is crucial for safe and efficient operation. By following the correct wiring connections and regularly inspecting the motor, you can ensure its longevity and reliability. Proper installation and maintenance are key factors in maximizing the performance of a 1 phase motor.