When it comes to controlling lights from two different locations, a 3-way light switching wiring diagram is essential. This type of setup allows you to turn the lights on or off from either switch, providing convenience and flexibility in any room.
Understanding how to wire a 3-way switch is crucial for homeowners and electricians alike. With the right diagram and knowledge, you can easily install this type of lighting control in your home without any hassle.
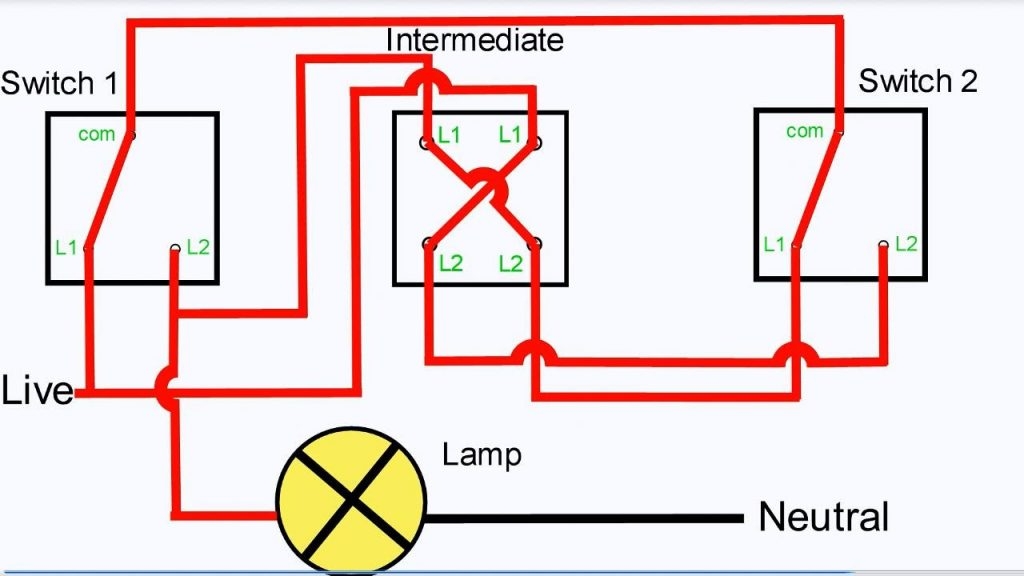
 3 Way Light Switching Wiring Diagram AndersGarnow (www.andersgarnow.com)
Here is a simple 3-way light switching wiring diagram to help you get started:
1. Begin by turning off the power to the circuit at the breaker box to ensure safety during installation.
2. Connect the power source to the common terminal of the first switch using a black wire. This is typically the screw terminal labeled “COM” on the switch.
3. Run a black wire from the common terminal of the first switch to the common terminal of the second switch. This creates a continuous circuit between the two switches.
4. Connect the traveler wires to the remaining terminals on each switch. These wires are typically red or brass in color and allow the switches to communicate with each other.
5. Finally, connect the neutral wires together and the ground wires to the switches for added safety.
With this wiring diagram, you can easily control your lights from two different locations with the flip of a switch. Remember to always turn off the power before working on any electrical wiring to prevent accidents.
By following these steps and using the 3-way light switching wiring diagram as a guide, you can enjoy the convenience and versatility of controlling your lights from multiple locations in your home.
Upgrade your lighting control system today with a 3-way switch setup and experience the convenience it brings to your daily routine.