When it comes to wiring subwoofers in your car audio system, understanding the ohm rating is crucial. One popular configuration is the 4 ohm dual voice coil subwoofer. With this setup, you have two voice coils that can be wired in different ways to achieve different impedance levels.
Proper wiring ensures that your subwoofer operates efficiently and delivers the best sound quality. In this article, we will discuss the wiring diagram for a 4 ohm dual voice coil subwoofer to help you set up your audio system correctly.
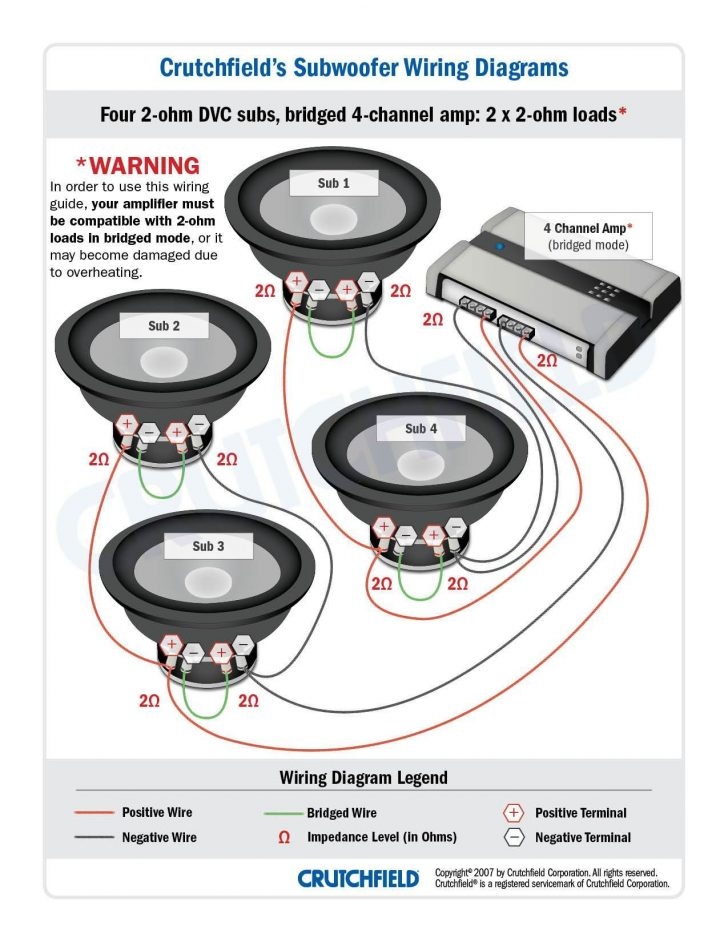
 2 4 Ohm Dual Voice Coil Wiring Diagram (stewart-switch.com)
For a 4 ohm dual voice coil subwoofer, you have two options for wiring: parallel or series. When wiring in parallel, you connect the positive terminals of both voice coils together and the negative terminals together. This results in a 2 ohm load. On the other hand, wiring in series involves connecting the positive terminal of one voice coil to the negative terminal of the other, and then using the remaining positive and negative terminals for your amplifier. This configuration will give you an 8 ohm load.
It’s important to note that the impedance level of your subwoofer affects how much power it can handle. Most amplifiers are designed to work with specific impedance levels, so make sure to match the impedance of your subwoofer to that of your amplifier for optimal performance.
Before wiring your subwoofer, carefully read the manufacturer’s instructions and refer to the wiring diagram provided. If you’re unsure about the wiring setup, consult a professional to avoid damaging your equipment.
In conclusion, understanding the wiring diagram for a 4 ohm dual voice coil subwoofer is essential for setting up your car audio system. Whether you choose to wire in parallel or series, make sure to follow the correct configuration to achieve the desired impedance level. By doing so, you’ll ensure that your subwoofer operates efficiently and delivers the best sound quality for your listening pleasure.