When it comes to connecting your trailer to your vehicle, having the right wiring is crucial. The 4 pin trailer connector is a standard plug used for most small trailers. It is important to understand how to wire it correctly to ensure your trailer lights work properly and you stay safe on the road.
Before you begin wiring your 4 pin trailer connector, make sure to have the necessary tools and materials on hand. You will need a wire cutter/stripper, electrical tape, and the wiring diagram for your specific connector. It is also important to check the wiring on your vehicle to ensure it matches the connector.
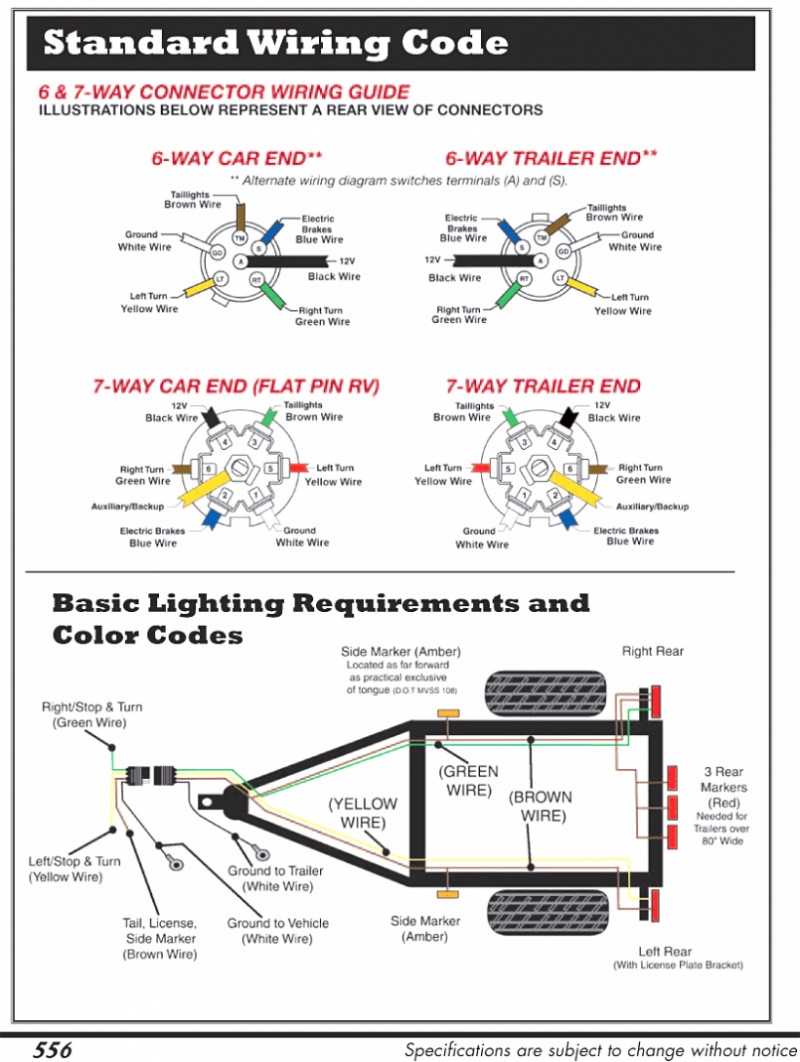
 7 Pin Trailer Connector Diagram (stewart-switch.com)
Start by identifying the wires on your trailer connector. The 4 pin connector will have four wires – white, brown, yellow, and green. The white wire is the ground wire, the brown wire is for the tail lights, the yellow wire is for the left turn signal, and the green wire is for the right turn signal.
Next, match the wires on your vehicle to the corresponding wires on the trailer connector. Connect the white wire to the ground wire, the brown wire to the tail light wire, the yellow wire to the left turn signal wire, and the green wire to the right turn signal wire. Use electrical tape to secure the connections and prevent any exposed wires.
Once you have connected all the wires, test your trailer lights to ensure they are working properly. Have someone help you by checking each light as you activate the turn signals and brake lights. Make any necessary adjustments to the wiring if needed.
In conclusion, wiring a 4 pin trailer connector is a simple process as long as you have the right tools and follow the wiring diagram. Properly connecting your trailer lights is essential for safety on the road. By following these steps, you can ensure your trailer lights work correctly and you have a safe towing experience.