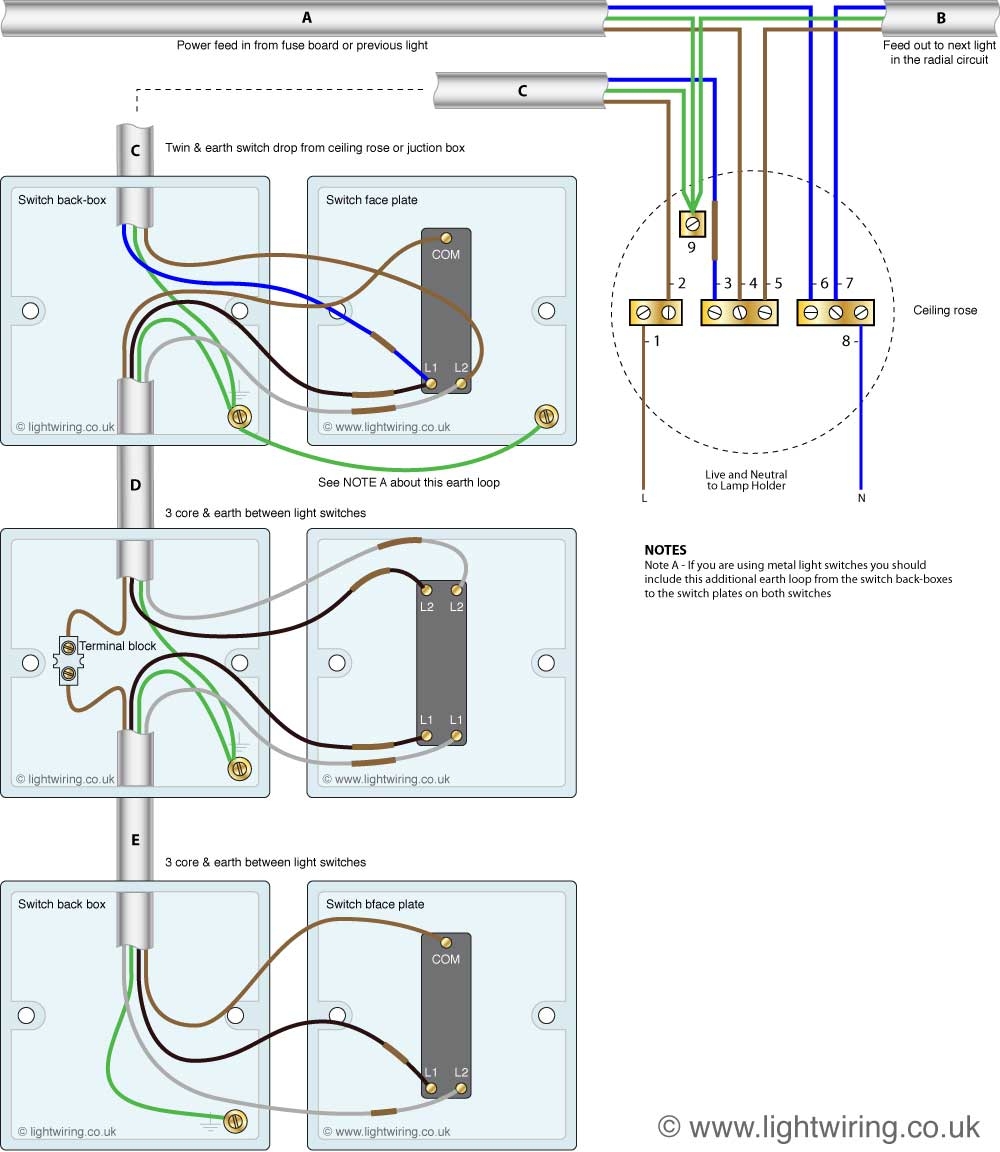
When it comes to wiring a 4-way switch, it can be a bit confusing for those who are not familiar with electrical work. A 4-way switch is used in combination with two 3-way switches to control a light fixture from three or more locations. This setup allows you to turn the light on or off from any of the switches, regardless of the current position of the other switches.
Understanding the wiring diagram for a 4-way switch is crucial to ensure the proper installation and functioning of the switch. It involves connecting the wires in a specific way to allow for the proper flow of electricity and control of the light fixture.
 Three Way Switch Wiring Diagram (panelwiring.netlify.app)
First, you will need to identify the wires in the circuit and label them accordingly. There are four terminals on a 4-way switch, and each terminal must be connected to the correct wire for the switch to work correctly. The wiring diagram will show you which wires to connect to each terminal on the switch.
Next, you will need to connect the wires to the 4-way switch using the appropriate wire connectors or screws. It is essential to follow the wiring diagram carefully to ensure that each wire is connected to the correct terminal on the switch. Once all the wires are connected, you can test the switch to make sure it is working properly.
It is important to remember that working with electricity can be dangerous, so if you are not comfortable with electrical work, it is best to hire a professional electrician to install the 4-way switch for you. Safety should always be a top priority when working with electrical wiring.
In conclusion, understanding the wiring diagram for a 4-way switch is essential for proper installation and functionality. By following the diagram carefully and connecting the wires correctly, you can ensure that the switch works as intended and allows you to control a light fixture from multiple locations.