When it comes to towing a trailer, having the right wiring setup is crucial for safety and functionality. One common wiring configuration is the 7 prong wiring diagram, which is used for larger trailers with multiple functions. Understanding how to wire your trailer with a 7 prong setup is important to ensure everything works properly when you hit the road.
Having a 7 prong wiring diagram can make the installation process much easier and less confusing. By following the diagram, you can easily connect the various wires to their corresponding functions on your trailer. This can help prevent any wiring mishaps and ensure that your trailer lights, brakes, and other functions work correctly.
 7 Prong Wiring Diagram Cadician 39 S Blog (2020cadillac.com)
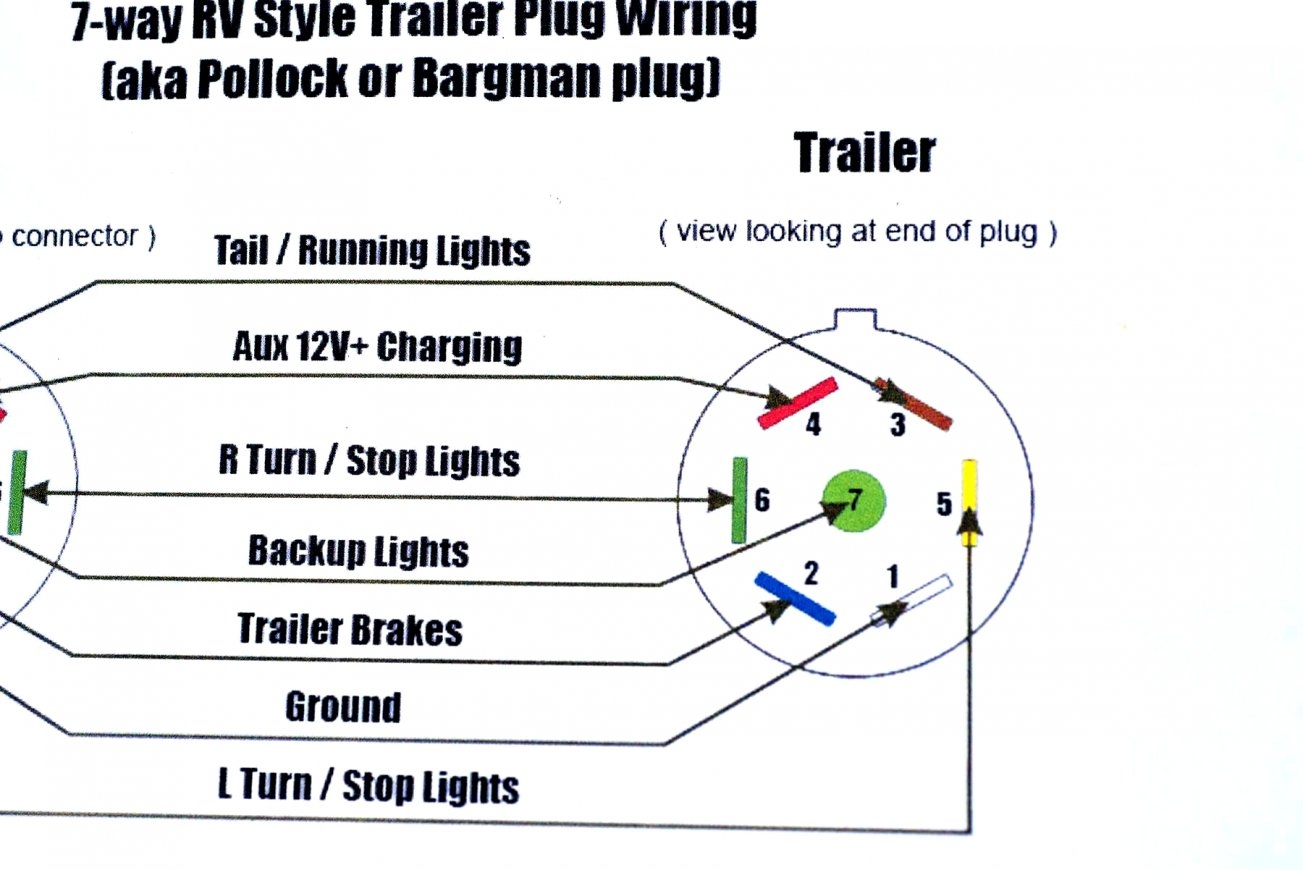
7 Prong Wiring Diagram
The 7 prong wiring diagram typically includes the following functions: ground, tail lights, left turn/brake, right turn/brake, electric brakes, auxiliary power, and reverse lights. Each of these functions is represented by a different colored wire, making it easy to identify and connect them properly.
When wiring your trailer with a 7 prong setup, it’s important to use the correct gauge of wire for each function to prevent any electrical issues. Additionally, ensuring that all connections are secure and properly insulated can help prevent any shorts or malfunctions while on the road.
Testing your 7 prong wiring setup before hitting the road is also crucial to ensure everything is working as it should. This can be done using a trailer tester or by connecting your trailer to your vehicle and checking each function individually. Making any necessary adjustments or repairs before heading out can help prevent any issues while towing.
In conclusion, understanding and following a 7 prong wiring diagram is essential for safely and effectively wiring your trailer. By using the correct wire gauge, making secure connections, and testing your setup before towing, you can ensure that your trailer functions properly and safely while on the road.