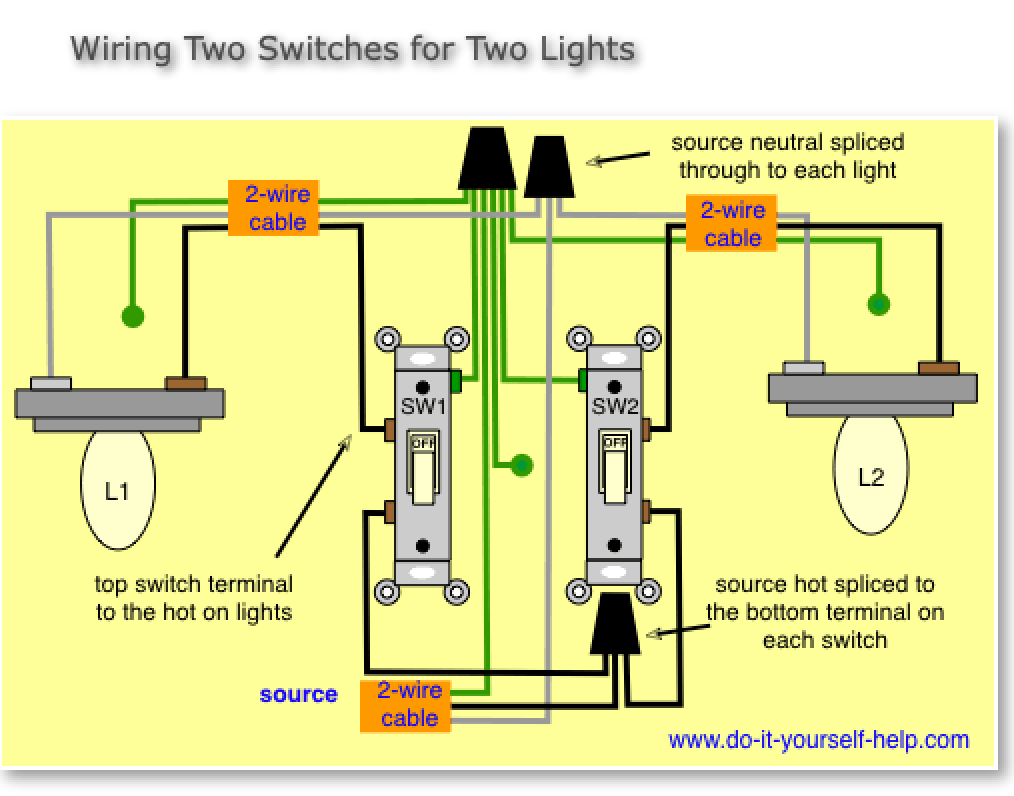
When it comes to controlling the lights in a room from two different locations, a 2-way light switch is the way to go. This type of switch allows you to turn the lights on or off from either switch, making it convenient for larger rooms or hallways.
Understanding how to wire a 2-way light switch is essential for any DIY enthusiast or electrician. By following the correct wiring diagram, you can easily install a 2-way switch in your home without any hassle.
 4 Way Switch Wiring Diagram Cadician 39 S Blog (2020cadillac.com)
Here is a simple wiring diagram for a 2-way light switch:
Step 1: Turn off the power to the circuit at the breaker panel to ensure safety during the installation process.
Step 2: Connect the common terminal of the first switch to the line or hot wire coming from the power source. This is usually indicated by a black wire.
Step 3: Connect the traveler wires of the first switch to the traveler terminals on the second switch. These wires are typically red or any color other than black.
Step 4: Connect the common terminal of the second switch to the load wire, which is the wire leading to the light fixture.
Step 5: Finally, connect the ground wires of both switches to the ground wire in the electrical box to ensure proper grounding.
Once you have completed these steps, you can turn the power back on and test the switches to see if they are working correctly. If done properly, you should be able to control the light fixture from either switch location.
In conclusion, understanding how to wire a 2-way light switch is a valuable skill for any homeowner. By following the correct wiring diagram and taking the necessary safety precautions, you can easily install a 2-way switch in your home. Remember to always turn off the power before starting any electrical work and consult a professional if you are unsure about any part of the installation process.