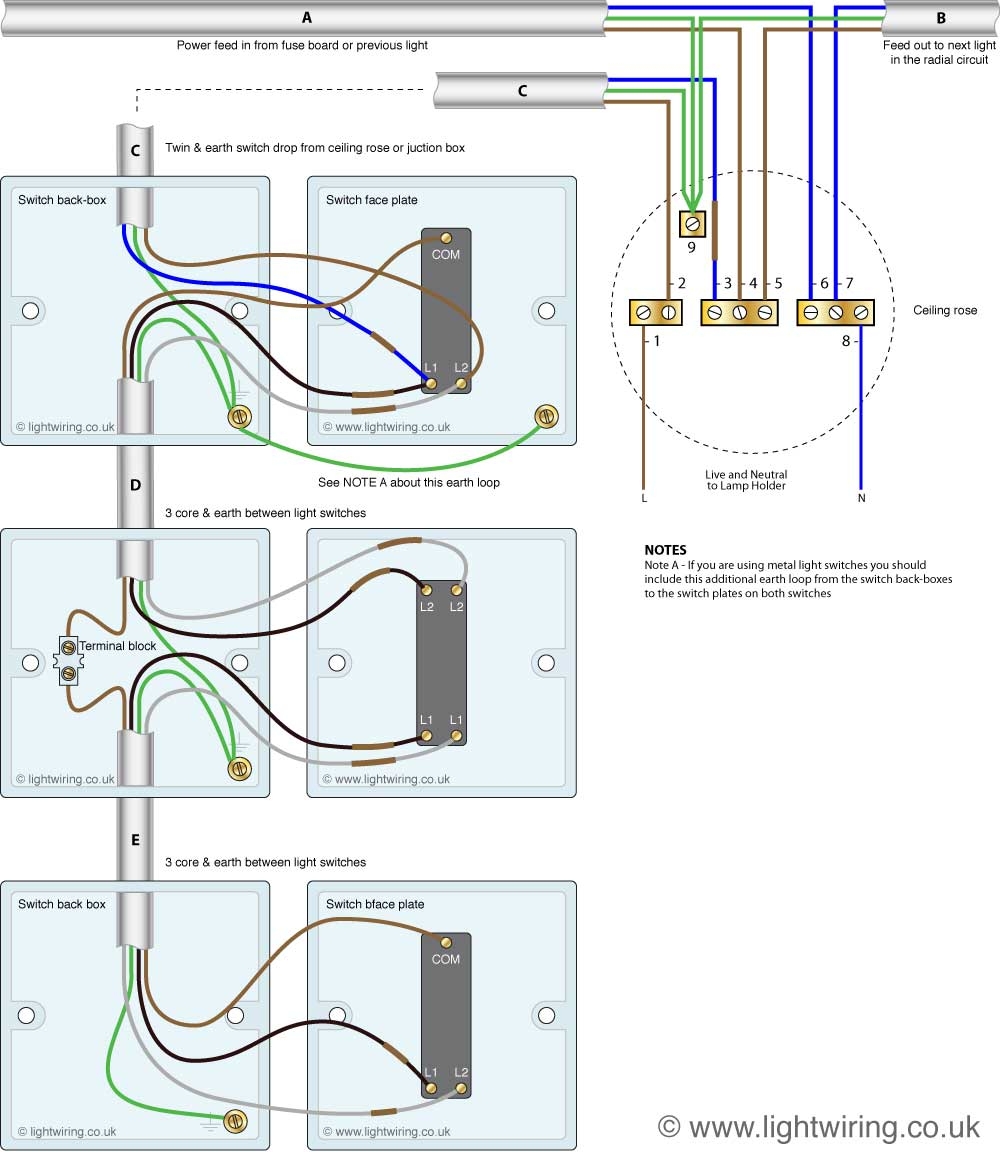
Two way switches are commonly used in homes to control lighting from two different locations. This type of switch allows you to turn the lights on or off from both ends of a room, hallway, or staircase. Understanding how to wire a two way switch is essential for proper installation and functionality.
When wiring a two way switch, you will need two switches, two-wire cable, and a ground wire. The switches are typically labeled as “1” and “2” to indicate which end of the circuit they are connected to. The two-wire cable is used to connect the switches together, while the ground wire provides safety by grounding the circuit.
 Wiring Diagram For Eagle 4 Way Switch (schematron.org)
To wire a two way switch, start by turning off the power to the circuit at the breaker box. Connect the black wire from the power source to the common terminal of switch 1, then connect the black wire from the light fixture to the common terminal of switch 2. Next, connect the white wires from the power source and light fixture together, and connect the ground wires to the ground terminal of each switch.
Once the wires are connected, install the switches in the electrical boxes and secure them in place. Turn the power back on and test the switches to ensure they are working correctly. If the lights do not turn on or off as expected, double check the wiring connections to make sure they are correct.
In conclusion, understanding how to wire a two way switch is important for anyone looking to install or replace switches in their home. By following the proper wiring diagram and taking necessary safety precautions, you can successfully wire a two way switch and control your lighting from multiple locations.