When it comes to installing a new light fixture in your home, it’s important to understand the wiring diagram to ensure proper installation and safety. A light fixture wiring diagram is a visual representation of how the electrical wires should be connected to the light fixture and the power source. It provides guidance on which wires to connect to each other and where they should be placed.
Before starting any electrical work, it’s crucial to turn off the power to the circuit you will be working on. This can be done by flipping the circuit breaker or removing the fuse that controls the specific circuit. Once the power is off, you can begin following the wiring diagram to connect the wires properly.
 Wiring A Light Fixture In Series (www.chanish.org)
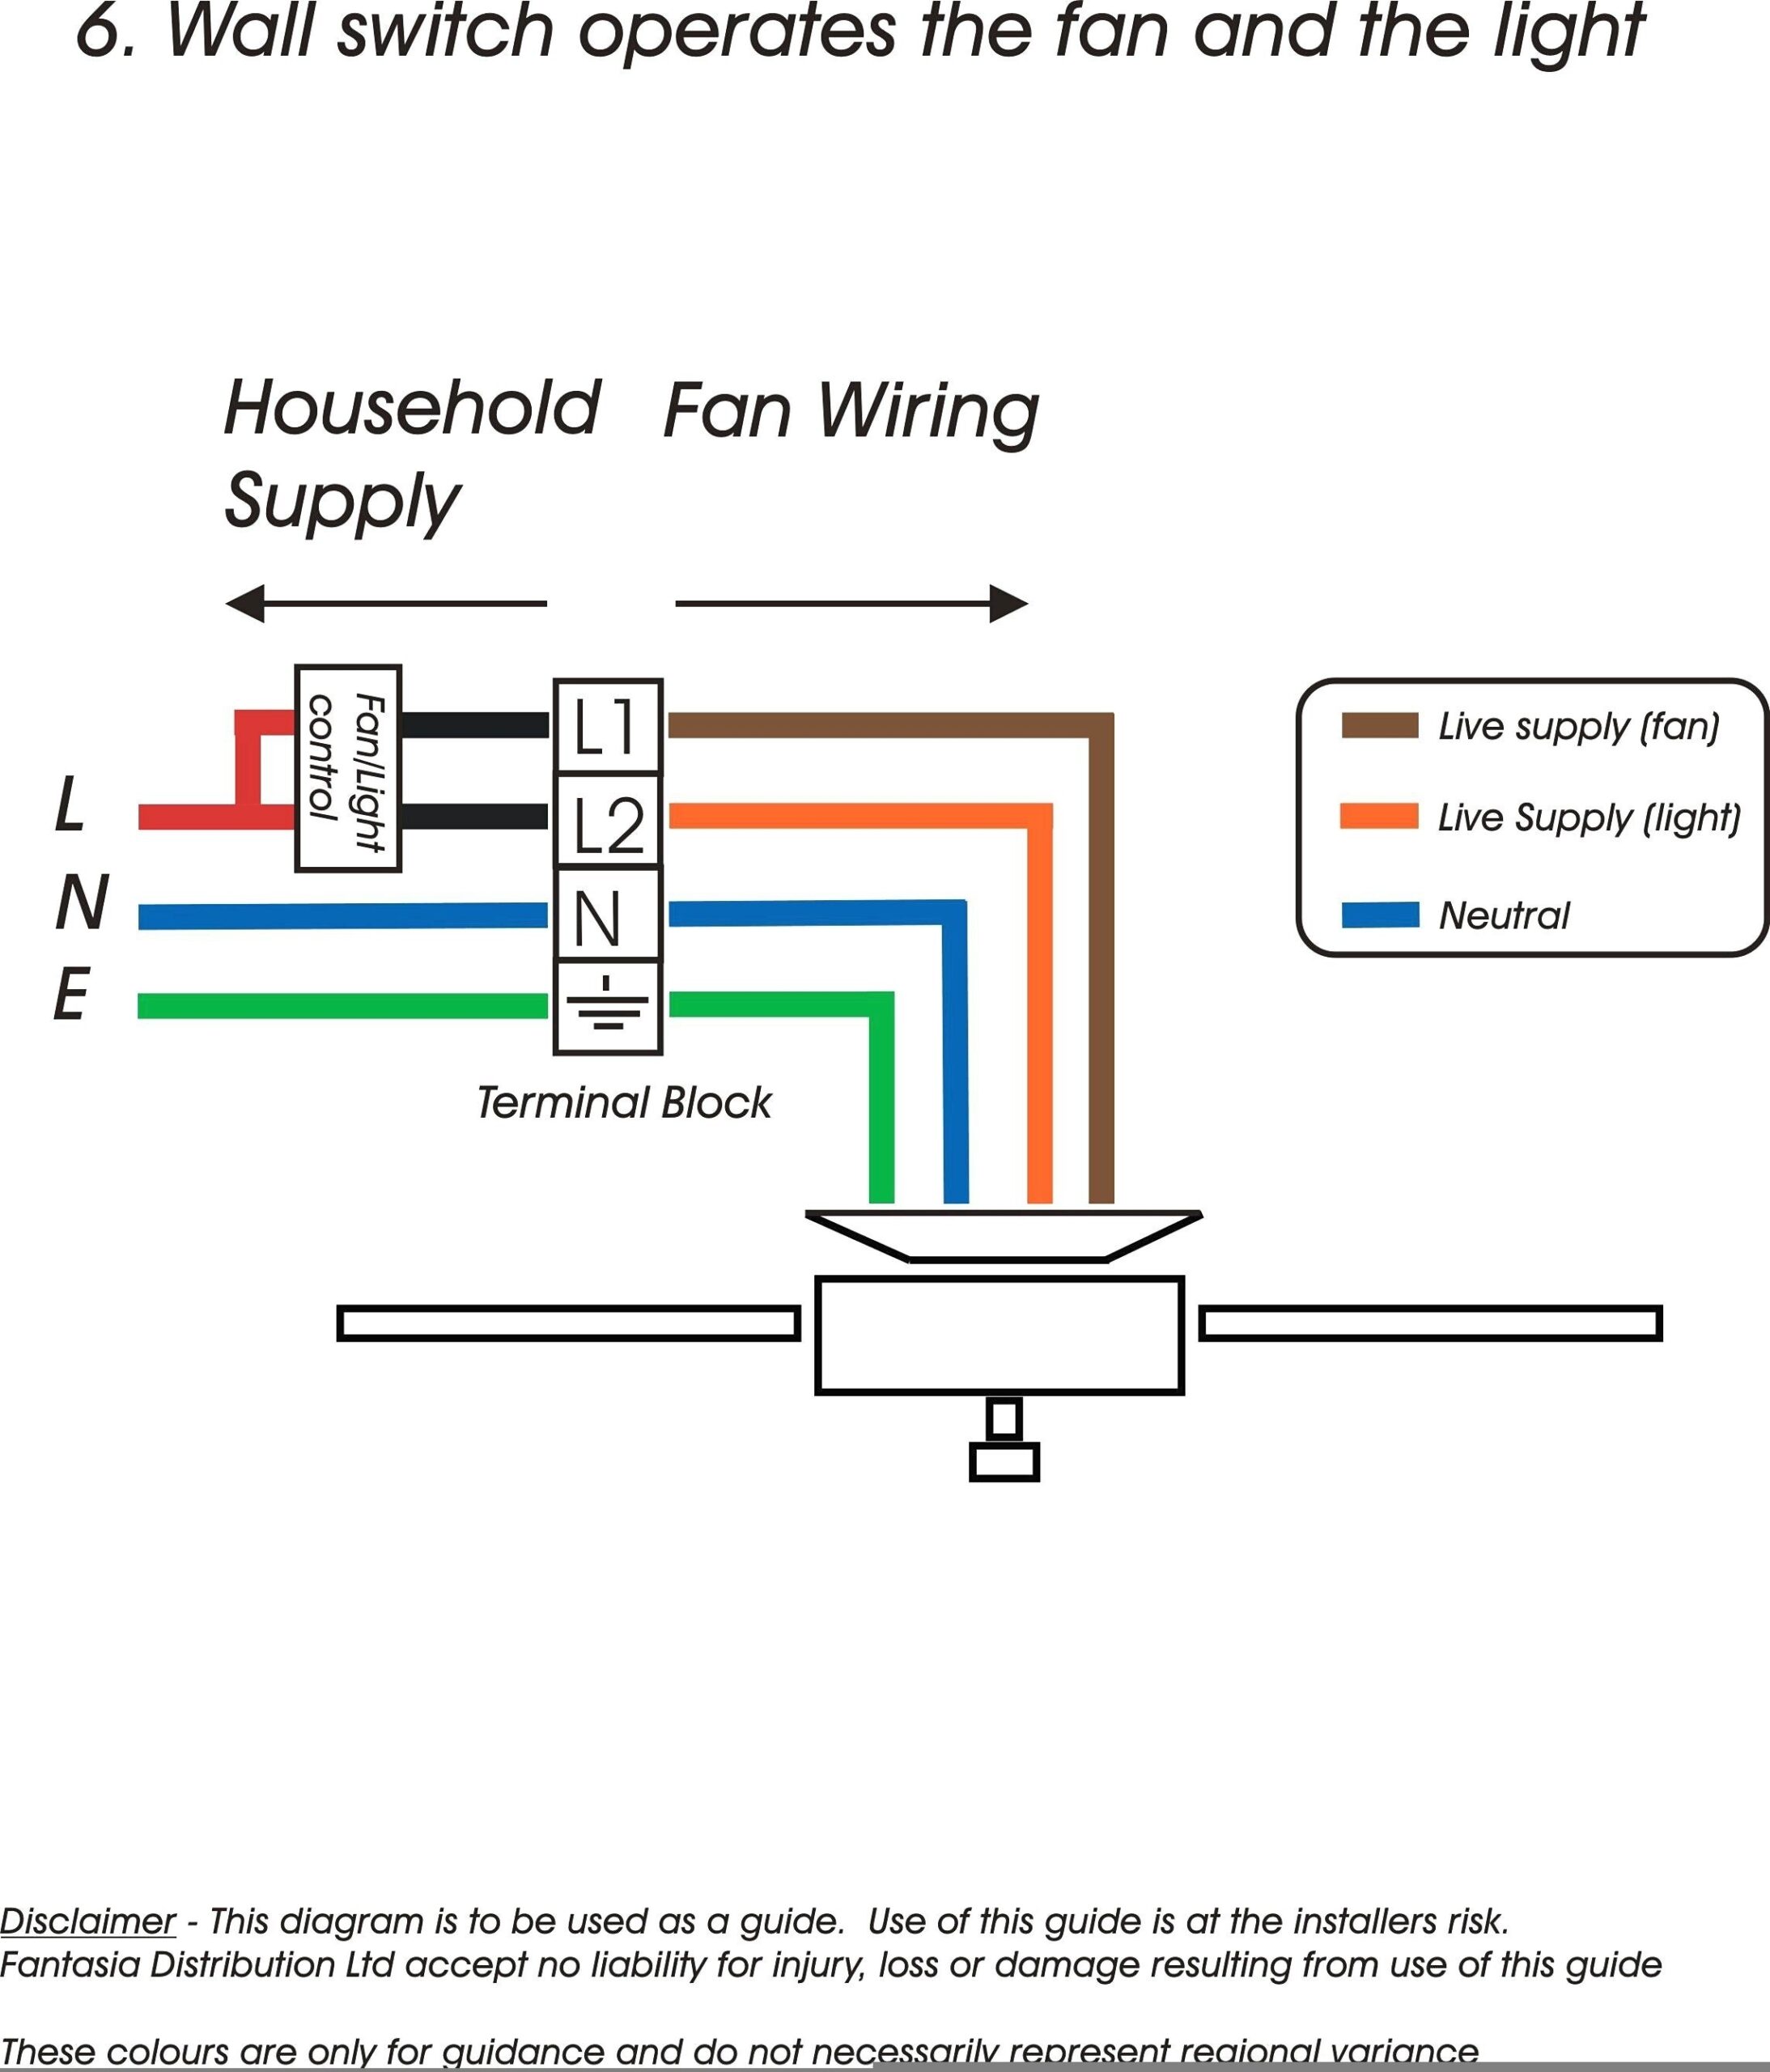
Typically, a light fixture wiring diagram will include the color-coding of the wires, such as black for hot wires, white for neutral wires, and green or bare copper for ground wires. It will also show where each wire should be connected, such as to the light fixture itself, the power source, and any switches that control the light.
One important thing to note is that it’s crucial to follow the wiring diagram exactly as it is shown to avoid any electrical hazards or damage to the light fixture. If you are unsure about any part of the diagram or the wiring process, it’s always best to consult a professional electrician for assistance.
After all the wires have been properly connected according to the wiring diagram, you can safely turn the power back on and test the light fixture to ensure it is working correctly. If the light does not turn on or there are any issues, double-check the wiring connections and consult the diagram again to troubleshoot the problem.
In conclusion, understanding a light fixture wiring diagram is essential for a successful and safe installation of a new light fixture. By following the diagram carefully and taking necessary precautions, you can ensure that your light fixture is properly connected and functioning as it should.