When it comes to setting up a network, having the right wiring diagram is crucial. Cat6 cables are a popular choice for their high-speed capabilities and reliability. Understanding how to properly wire Cat6 cables can help ensure a smooth and efficient network connection.
Before diving into the wiring process, it’s important to gather all the necessary tools and materials. This includes Cat6 cables, RJ45 connectors, a crimping tool, and a cable tester. Having everything prepared will make the installation process much easier.
 9 Simple Steps To Wire An Ethernet Plug Like A Pro Moo Wiring (moowiring.com)
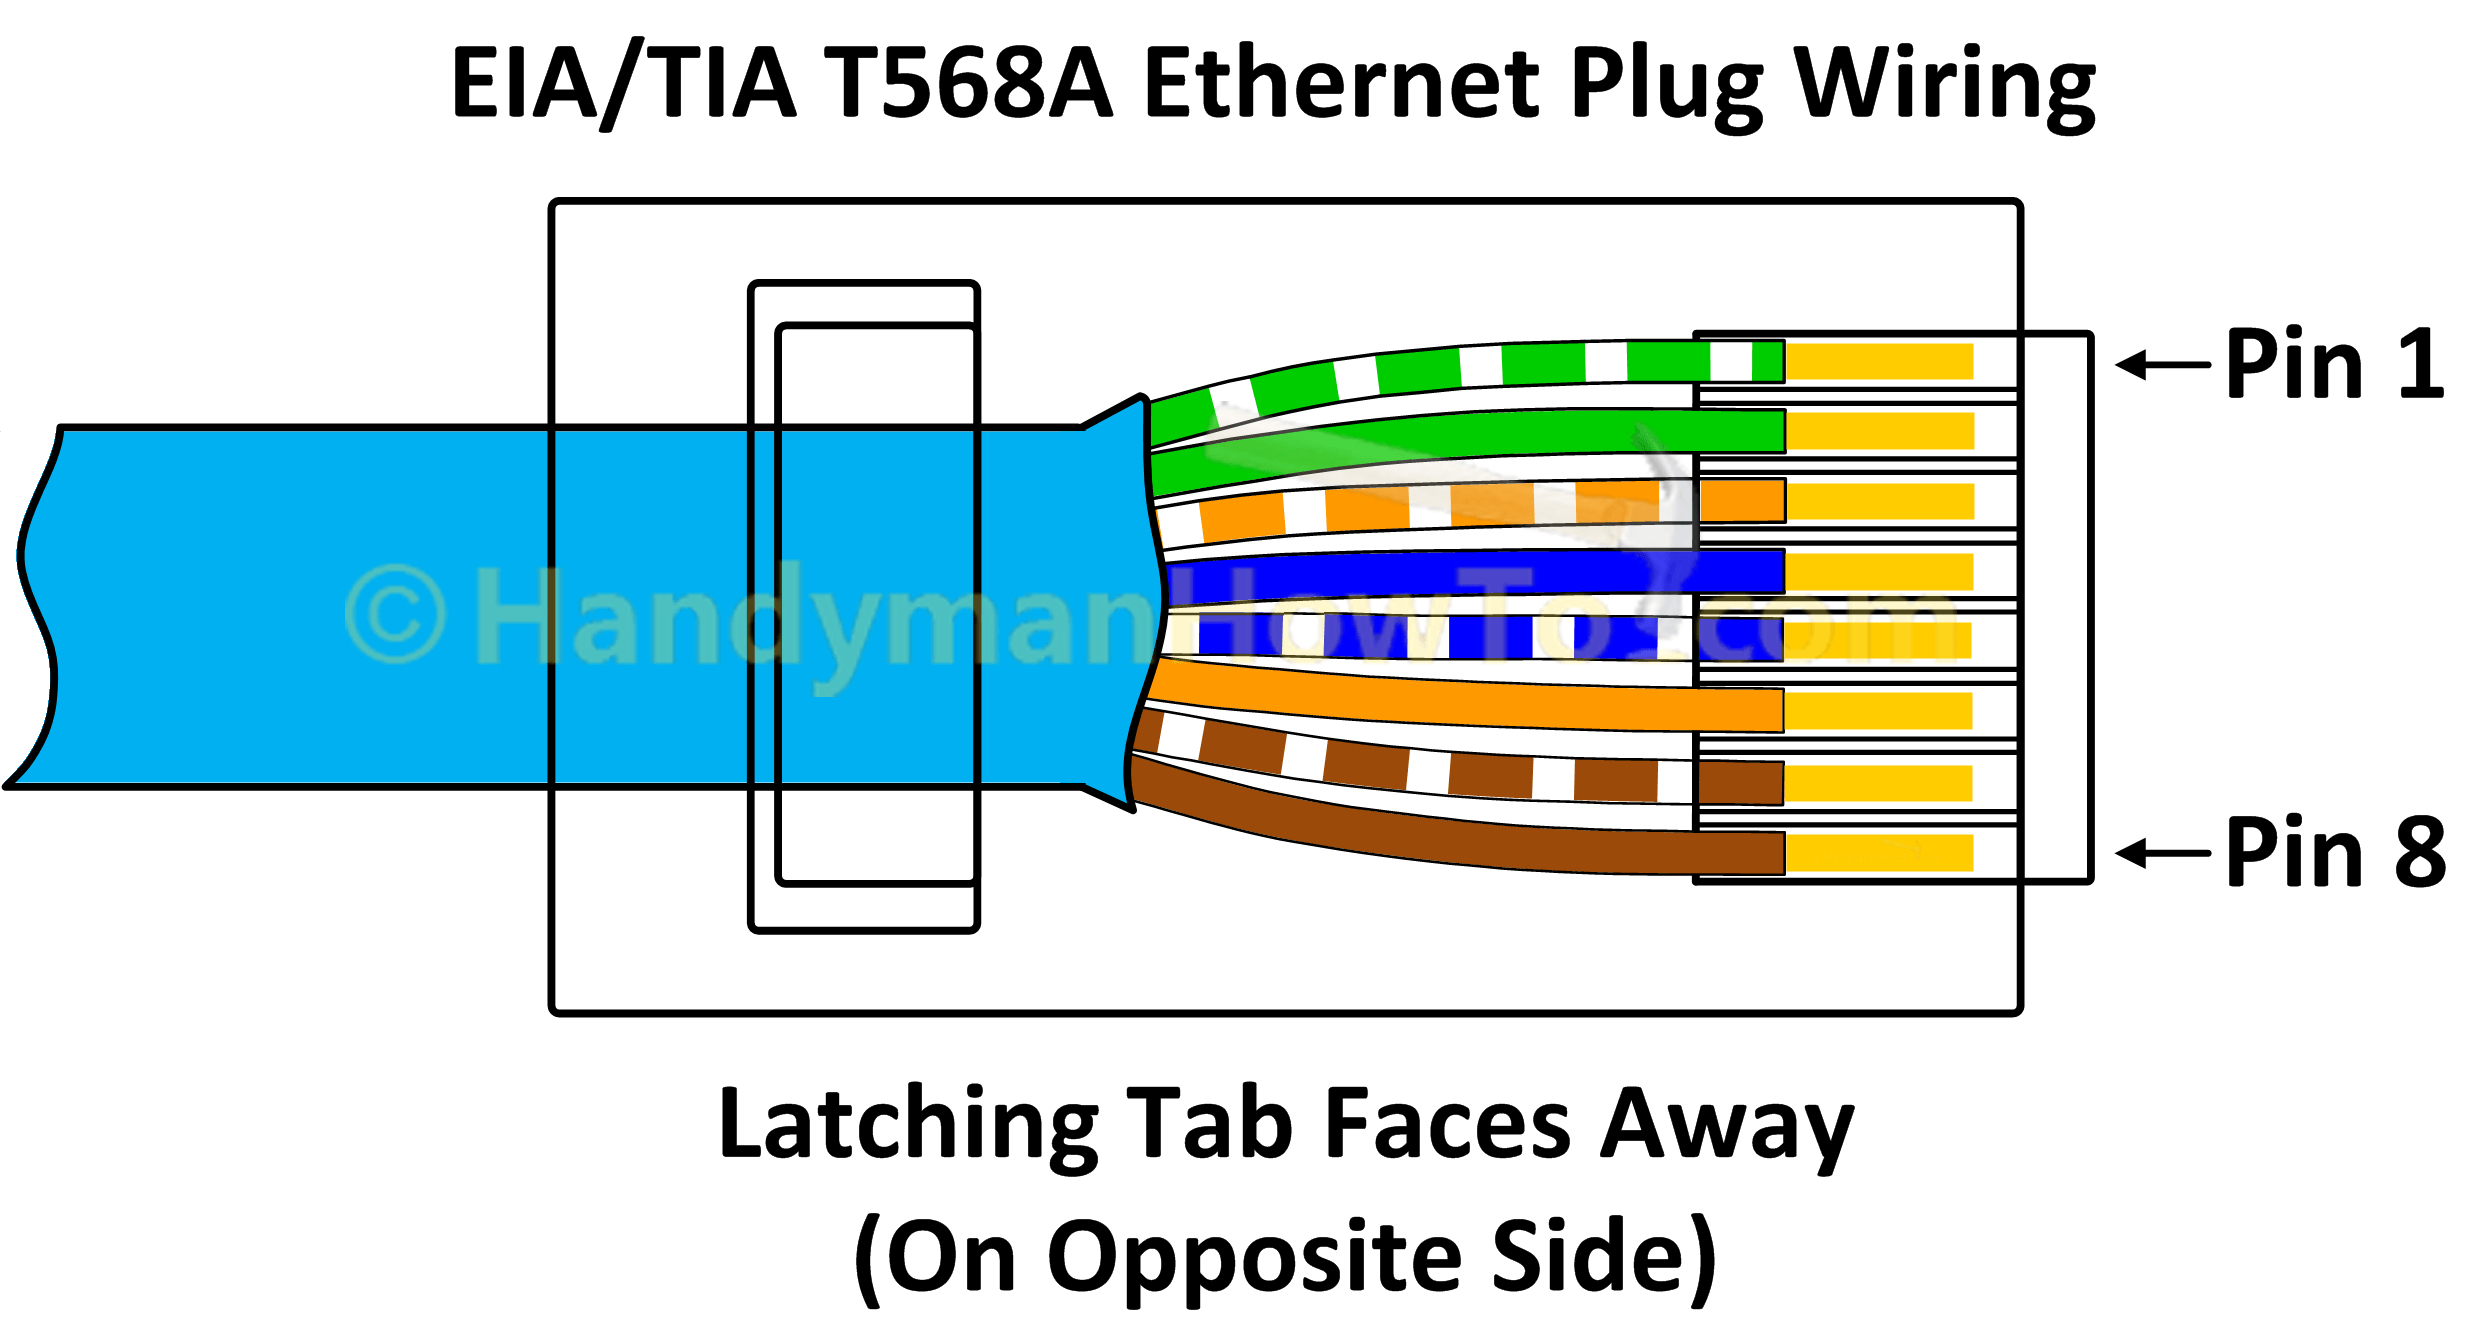
Start by stripping the outer jacket of the Cat6 cable to expose the inner wires. The Cat6 cable consists of four twisted pairs of wires, each color-coded for easy identification. It’s important to follow the T568A or T568B wiring standard when connecting the wires to the RJ45 connector.
Once the wires are properly aligned and inserted into the connector, use the crimping tool to secure the connection. Be sure to check for any loose connections or exposed wires before testing the cable with a cable tester. This will help ensure that the cable is properly wired and ready for use.
After testing the cable, it can be connected to the network devices such as computers, routers, or switches. The Cat6 cable’s high-speed capabilities make it ideal for applications that require reliable and fast data transmission. With the proper wiring diagram and installation process, a Cat6 cable can provide a stable and efficient network connection.
In conclusion, understanding how to wire a Cat6 cable is essential for setting up a reliable network connection. By following the correct wiring standards and using the proper tools, you can ensure that your network operates smoothly and efficiently. With a well-wired Cat6 cable, you can enjoy fast and reliable data transmission for all your networking needs.