Electric dryers are a convenient and efficient way to dry your clothes quickly. However, if you are experiencing issues with your dryer not turning on or heating properly, it may be due to a wiring problem. Understanding the wiring diagram for your electric dryer can help you troubleshoot and fix any issues that may arise.
Before attempting to work on your electric dryer, it is important to turn off the power at the circuit breaker to avoid any accidents. Additionally, make sure to unplug the dryer from the outlet before inspecting or working on the wiring.
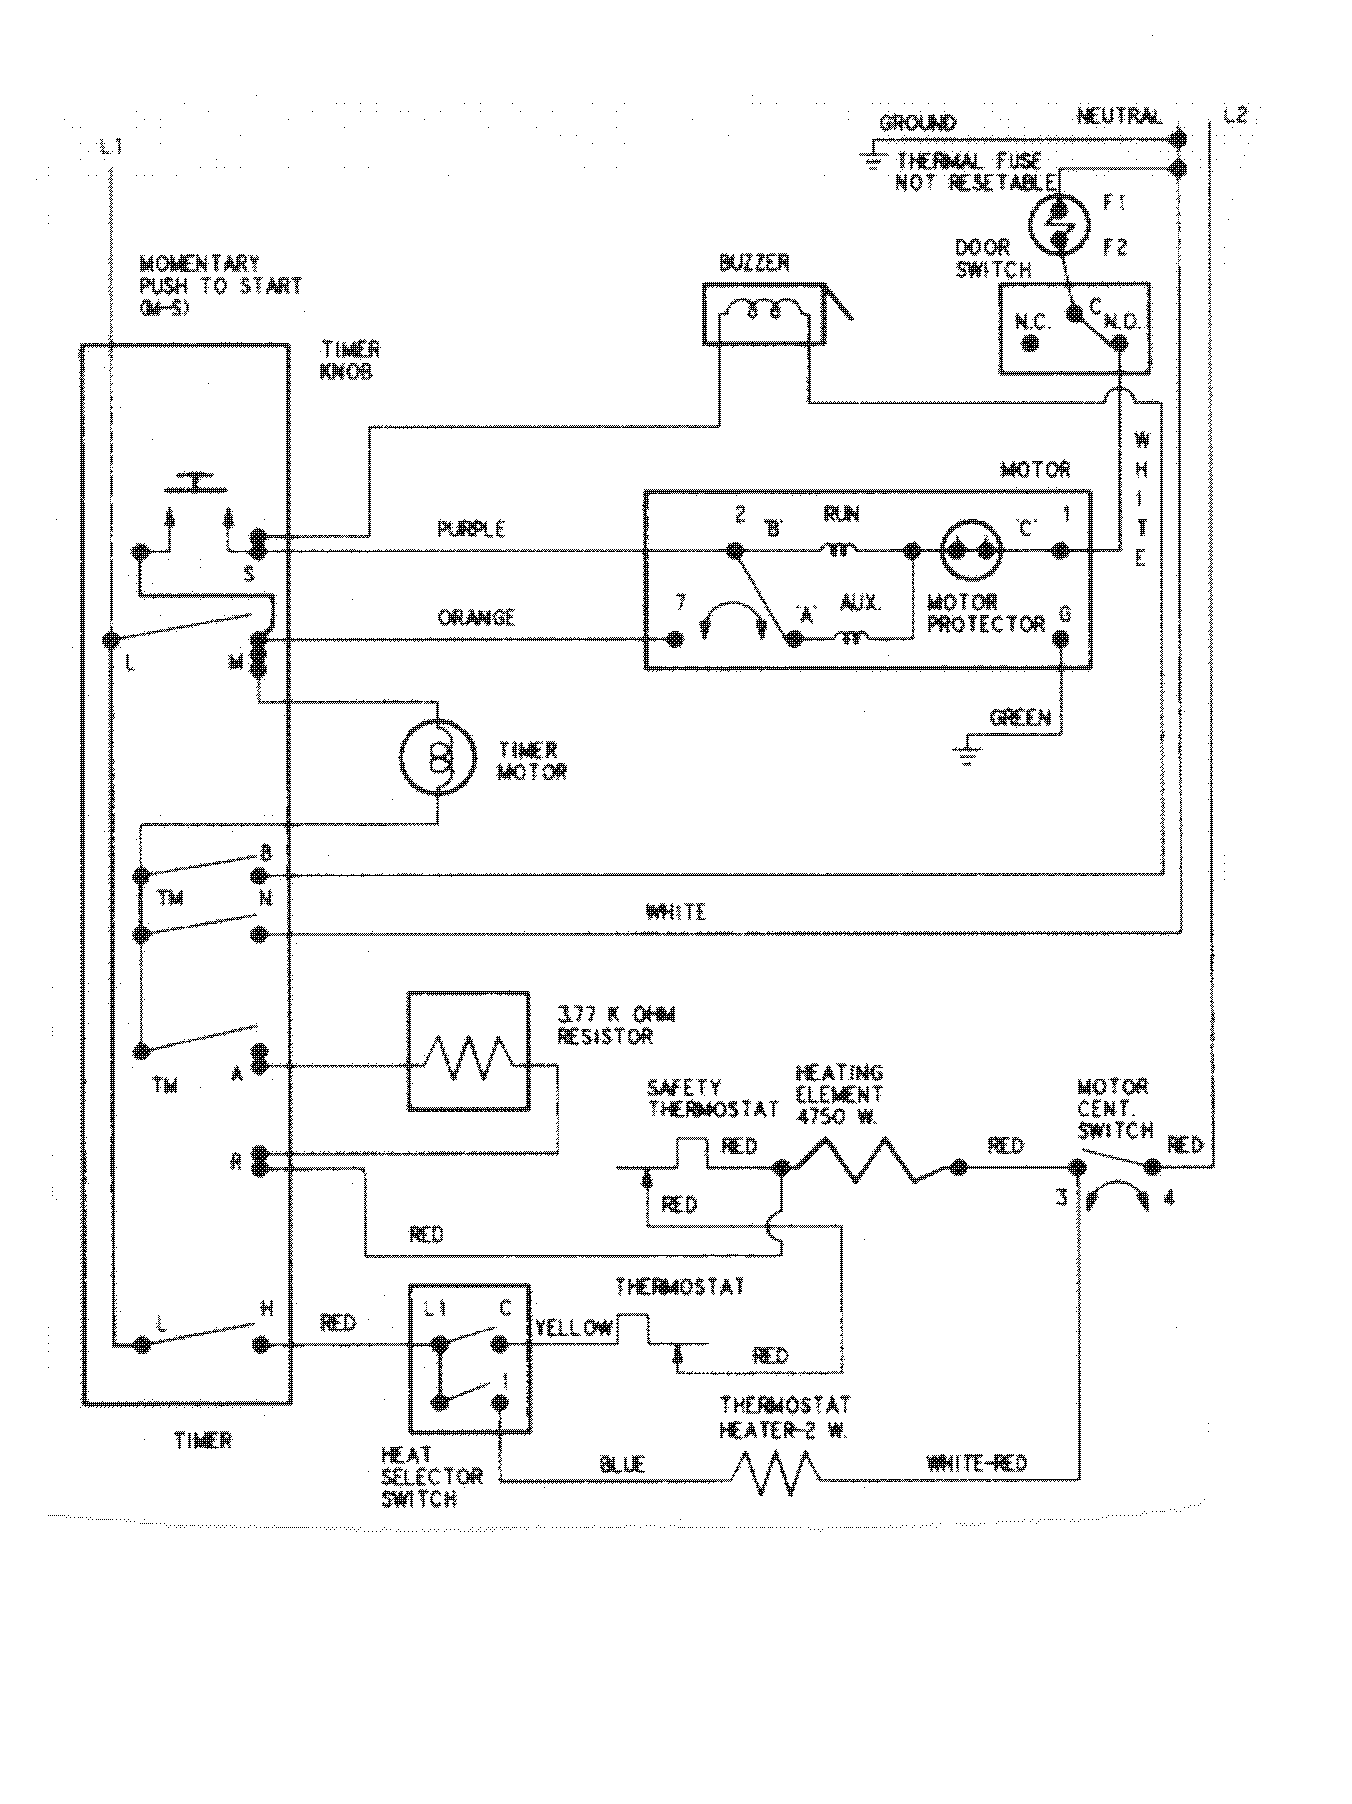
 4 Wire Dryer Schematic Wiring Diagram Wiring Diagram Dryer Plug (annawiringdiagram.com)
When looking at the wiring diagram for your electric dryer, you will notice that there are different colored wires that connect various components of the dryer. The main components include the heating element, thermostat, timer, motor, and power supply. Each wire is color-coded and labeled to indicate its function and where it should be connected.
It is important to follow the wiring diagram carefully to ensure that each wire is connected to the correct component. If you are unsure about how to read the diagram or which wire goes where, it is best to seek the help of a professional electrician to avoid any further damage to your dryer.
Common problems that may arise with electric dryer wiring include loose or frayed wires, burnt connections, or faulty components. By referring to the wiring diagram and conducting a thorough inspection of the wiring, you can identify and fix any issues that may be causing your dryer to malfunction.
In conclusion, understanding the wiring diagram for your electric dryer is essential for troubleshooting and fixing any issues that may arise. By following the diagram carefully and conducting a thorough inspection of the wiring, you can ensure that your dryer is working efficiently and safely. If you are unsure about how to read the diagram or make any repairs, it is always best to seek the help of a professional electrician.