Installing a Nest thermostat is a great way to improve energy efficiency in your home and have more control over your heating and cooling systems. However, figuring out the wiring for your Nest thermostat can be a bit tricky if you’re not familiar with HVAC systems.
Before you start installing your Nest thermostat, it’s important to understand the wiring diagram specific to your HVAC system. The wiring diagram will show you how to properly connect the wires from your HVAC system to the Nest thermostat to ensure it functions correctly.
 How To Properly Wire Your Nest Thermostat A 4 Wire Diagram Guide (resolutionsforyou.com)
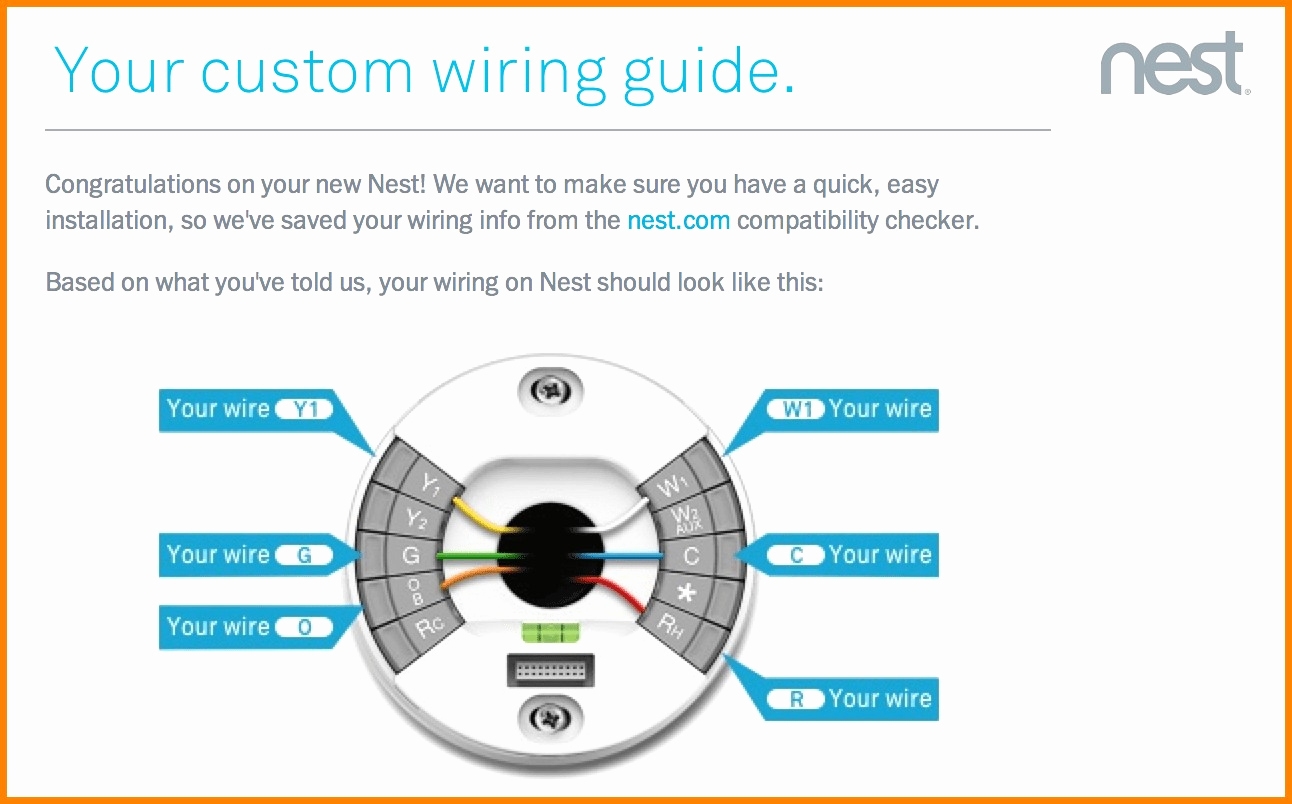
When looking at the wiring diagram for your Nest thermostat, you’ll typically see labels such as Rh, Rc, W, Y, G, C, etc. These labels correspond to the different wires coming from your HVAC system. Each wire has a specific function, such as providing power, controlling the heating system, or activating the cooling system.
It’s important to follow the Nest thermostat wiring diagram carefully to avoid damaging your HVAC system or the thermostat itself. If you’re unsure about how to proceed, it’s best to consult a professional HVAC technician who can help you with the installation process.
Once you’ve successfully connected the wires according to the Nest thermostat wiring diagram, you can proceed with setting up your thermostat and configuring it to your desired settings. With a properly installed Nest thermostat, you can enjoy the convenience of remote temperature control, energy savings, and a more comfortable home environment.
In conclusion, understanding the Nest thermostat wiring diagram is crucial for a successful installation process. By following the diagram and connecting the wires correctly, you can ensure that your Nest thermostat functions properly and optimizes the efficiency of your HVAC system. If you encounter any difficulties during the installation, don’t hesitate to seek help from a professional to avoid any potential issues.