When it comes to installing a Nest thermostat, proper wiring is essential for the device to function correctly. The wiring diagram provided by Nest can help you understand how to connect the thermostat to your HVAC system. By following the diagram accurately, you can ensure that your thermostat works efficiently and effectively.
There are several different wiring diagrams available for Nest thermostats, depending on the type of HVAC system you have. The most common diagrams include options for single-stage, multi-stage, and heat pump systems. It is crucial to identify the type of system you have and use the corresponding wiring diagram for installation.
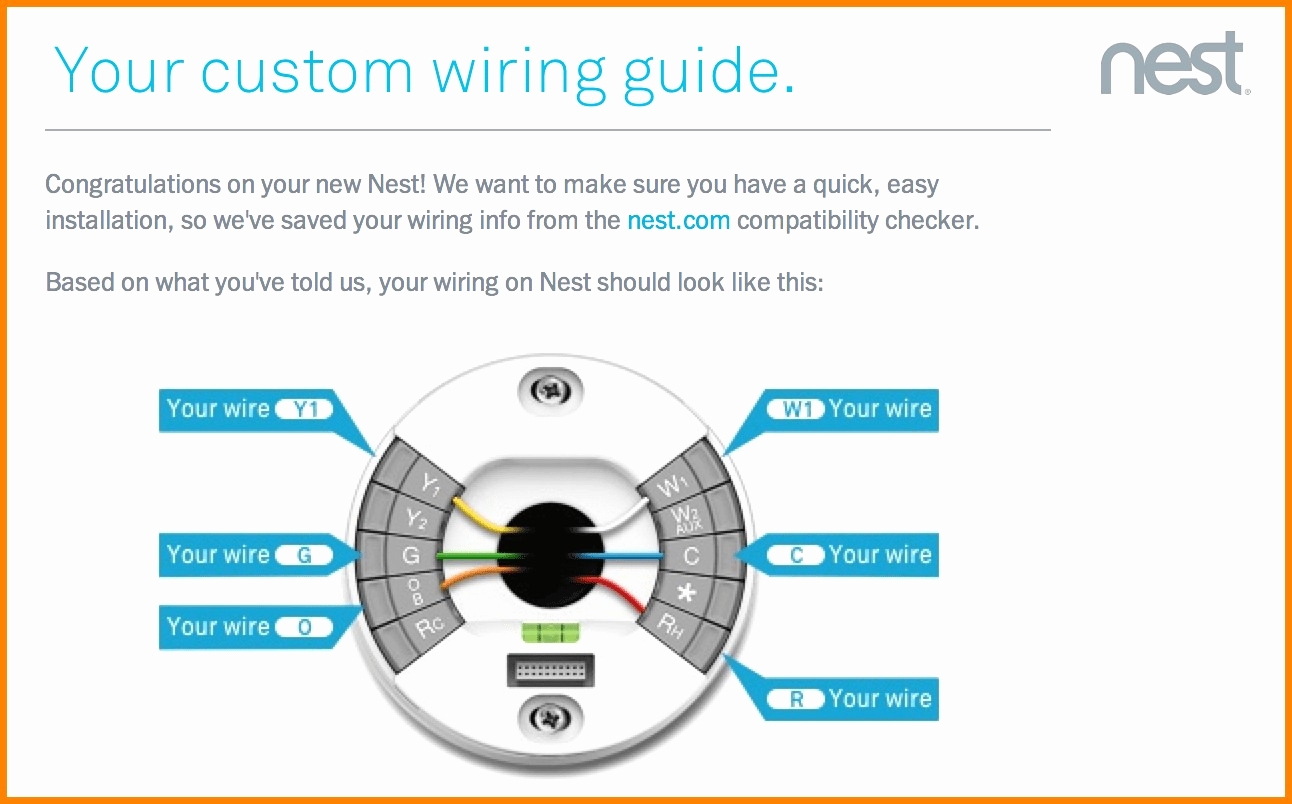
 Nest Thermostat Wiring Diagram For Combi Boiler Wiring Diagram And (www.caretxdigital.com)
For single-stage systems, the wiring diagram typically includes connections for the R (power), C (common), W (heat), and Y (cooling) terminals. In multi-stage systems, additional terminals such as W2 and Y2 may be present for second-stage heating and cooling. Heat pump systems have even more terminals, including O/B for reversing valve control.
It is essential to follow the Nest thermostat wiring diagram carefully, ensuring that each wire is connected to the correct terminal. Incorrect wiring can lead to malfunctions, system damage, or even safety hazards. If you are unsure about the wiring or installation process, it is best to consult a professional HVAC technician.
Once the Nest thermostat is properly wired and installed, you can enjoy the benefits of a smart, energy-efficient heating and cooling system. The thermostat’s advanced features, such as learning algorithms and remote control capabilities, can help you save money on energy bills and improve comfort in your home.
In conclusion,
Proper wiring is crucial for the successful installation and operation of a Nest thermostat. By using the correct wiring diagram for your HVAC system and following the instructions carefully, you can ensure that your thermostat functions optimally. If you encounter any difficulties during the installation process, do not hesitate to seek professional assistance to avoid any potential issues.