Thermostat wiring diagrams are essential for homeowners looking to install or replace a thermostat in their home. These diagrams provide a visual representation of how to wire the thermostat correctly, ensuring that the heating and cooling system operates effectively and efficiently.
Understanding thermostat wiring diagrams can be daunting for those who are not familiar with electrical systems. However, with the right guidance and knowledge, homeowners can confidently tackle the task of wiring their thermostat without the need for professional help.
 Honeywell Thermostat Wiring Instructions Diy House Help Wiring (2020cadillac.com)
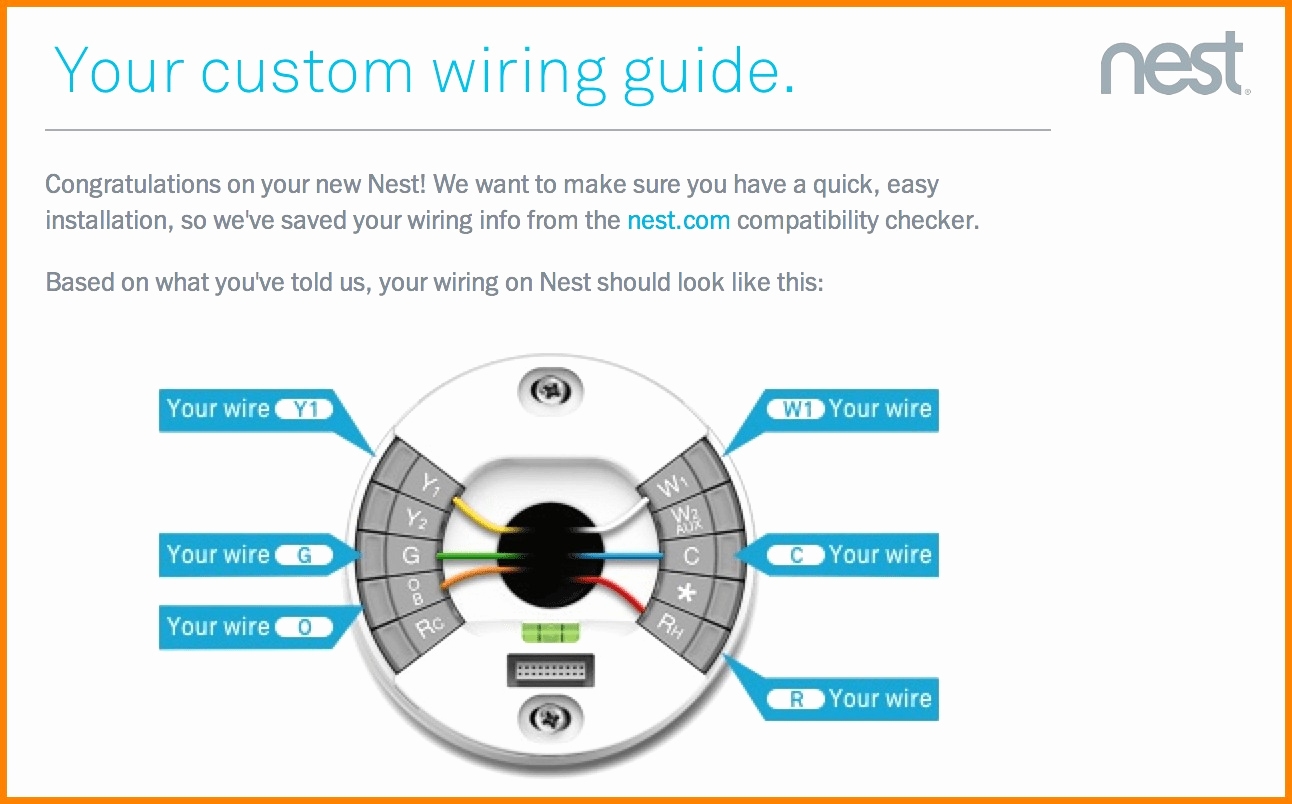
When looking at a thermostat wiring diagram, it is important to identify the various wires and their corresponding terminals. Typically, thermostats have terminals labeled R, W, Y, G, and C. Each wire serves a specific function in the heating and cooling system, such as controlling the furnace, air conditioner, fan, and power source.
Before beginning the wiring process, homeowners should turn off the power to the heating and cooling system to prevent any accidents or damage. It is also crucial to follow the manufacturer’s instructions and the wiring diagram closely to ensure the thermostat is wired correctly.
Once the wiring is complete, homeowners can test the thermostat to ensure it is functioning properly. This may involve adjusting the temperature settings and checking that the heating and cooling system responds accordingly. If there are any issues, homeowners can refer back to the wiring diagram to troubleshoot and make any necessary corrections.
In conclusion, thermostat wiring diagrams are valuable resources for homeowners looking to install or replace a thermostat in their home. By following the diagram and instructions carefully, homeowners can confidently wire their thermostat and ensure that their heating and cooling system operates efficiently. With a little knowledge and guidance, homeowners can successfully complete this task and enjoy a comfortable indoor environment.