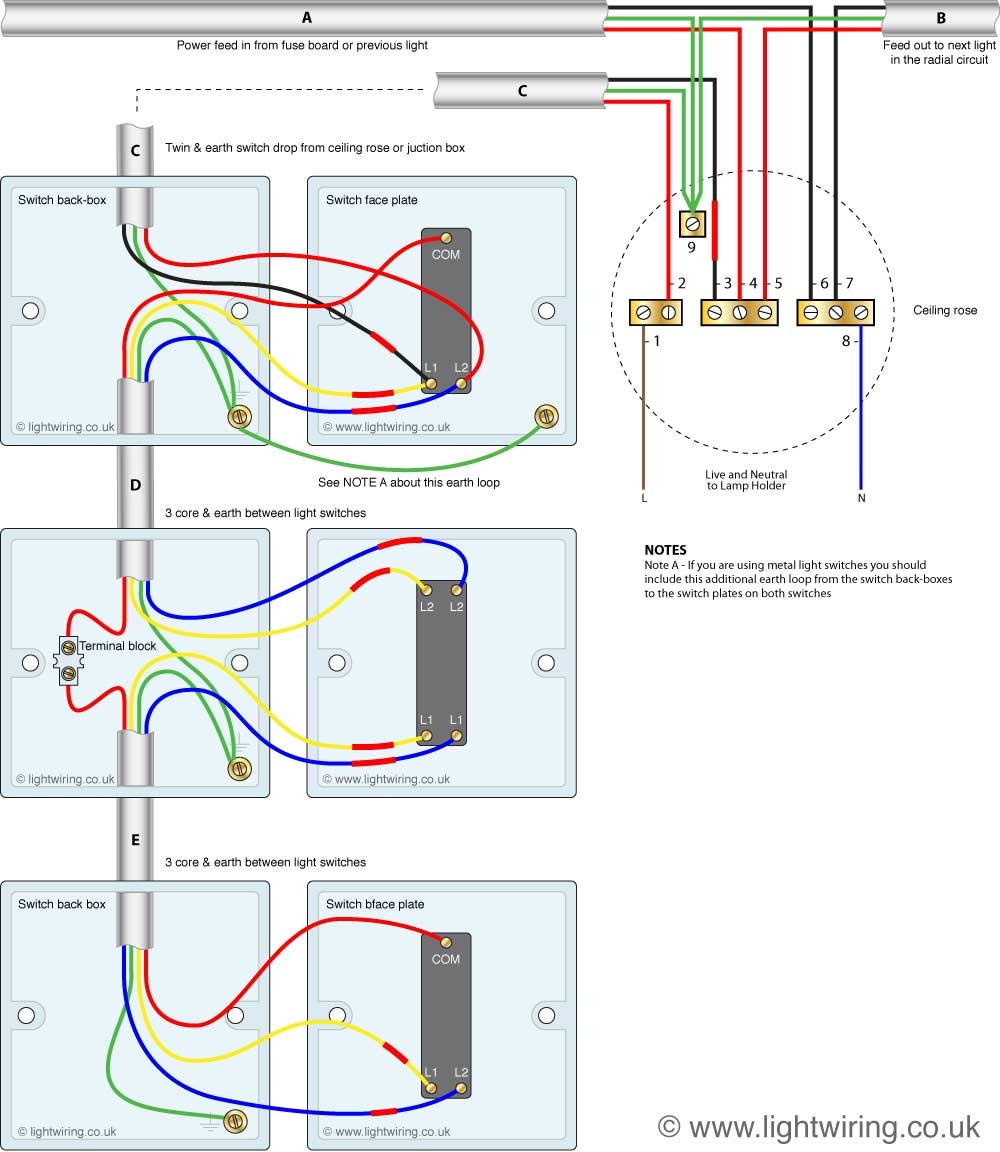
When it comes to controlling a light fixture from two different locations, a 3-way switch is the perfect solution. This type of switch allows you to turn the light on or off from multiple points, providing convenience and flexibility in your home.
Understanding how to wire a 3-way switch diagram can be helpful for DIY enthusiasts looking to upgrade their lighting system. By following the proper wiring instructions, you can easily install a 3-way switch and enjoy the convenience it offers.
 How To Wire A 3 Way Switch Diagram For 12 Volt System (signalwires.com)
Basic Wiring Setup
To wire a 3-way switch, you will need three wires: a hot wire, a traveler wire, and a neutral wire. The hot wire carries the electrical current, while the traveler wire connects the two switches. The neutral wire completes the circuit and provides a return path for the current.
Start by turning off the power to the circuit at the main electrical panel. Identify the hot wire in the existing switch box and connect it to the common terminal of the first 3-way switch. Then, connect the traveler wire to the other terminal of the switch. Repeat this process for the second switch, making sure to connect the traveler wire to the same terminal on both switches.
Once the switches are wired, connect the light fixture to the common terminal of the second switch and the neutral wire to the neutral terminal. Finally, turn the power back on and test the switches to ensure they are working properly.
It’s important to follow the wiring diagram carefully to avoid any mistakes that could lead to electrical hazards. If you’re unsure about how to wire a 3-way switch, consult a professional electrician for assistance.
With the right tools and knowledge, you can successfully wire a 3-way switch and enjoy the convenience of controlling your lights from multiple locations. Whether you’re looking to upgrade your home’s lighting system or simply add a new switch, understanding the basics of wiring a 3-way switch diagram is essential.