When it comes to wiring a 2 way light switch, it’s important to understand the basic principles of electrical wiring. A 2 way switch allows you to control a single light fixture from two different locations, such as at the top and bottom of a staircase. This type of switch is commonly used in hallways, staircases, and large rooms where multiple switches are needed for convenience.
Before starting the wiring process, make sure to turn off the power to the circuit at the breaker box to avoid any accidents. It’s also a good idea to use a voltage tester to double-check that the power is off before proceeding with the wiring.
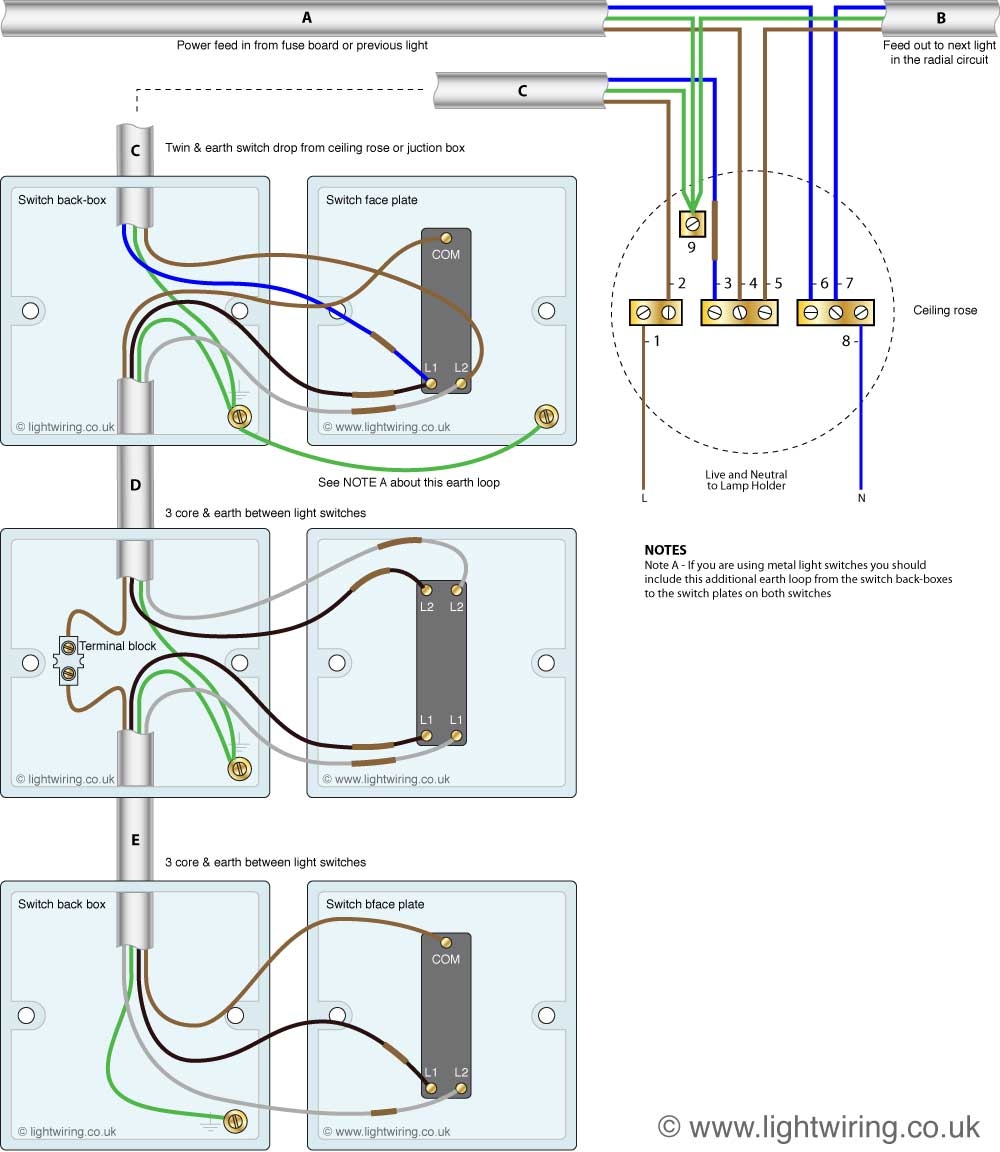
 2 Way Light Switch Wiring Diagram Nz (wireenginearchangels.z14.web.core.window…)
Next, you will need to gather the necessary tools and materials for the job, including a screwdriver, wire stripper, electrical tape, and the appropriate wires and switches. It’s important to follow the wiring diagram carefully to ensure that the circuit is properly connected and safe to use.
Start by connecting the power source to the common terminal of the first switch. Then, connect the traveler wires to the corresponding terminals on both switches. Finally, connect the load wire to the common terminal of the second switch. Make sure to secure all connections with wire nuts and electrical tape to prevent any loose wires.
Once you have completed the wiring process, double-check all connections and test the switches to make sure they are functioning correctly. If everything is working properly, you can turn the power back on at the breaker box and enjoy your newly installed 2 way light switch!
Overall, wiring a 2 way light switch diagram may seem intimidating at first, but with the right tools and knowledge, it can be a straightforward and rewarding DIY project. Just remember to follow the wiring diagram carefully and take all necessary safety precautions to ensure a successful installation.