Wiring a 3 way switch diagram is an essential skill for any homeowner or electrician. A 3 way switch allows you to control a single light or set of lights from two different locations. This can be useful in rooms with multiple entrances or staircases where you want to be able to turn the lights on or off from different locations.
Understanding how to wire a 3 way switch can seem daunting at first, but with the right diagram and a little patience, you can easily master this skill. It’s important to follow the correct wiring diagram to ensure that the switch functions properly and safely.
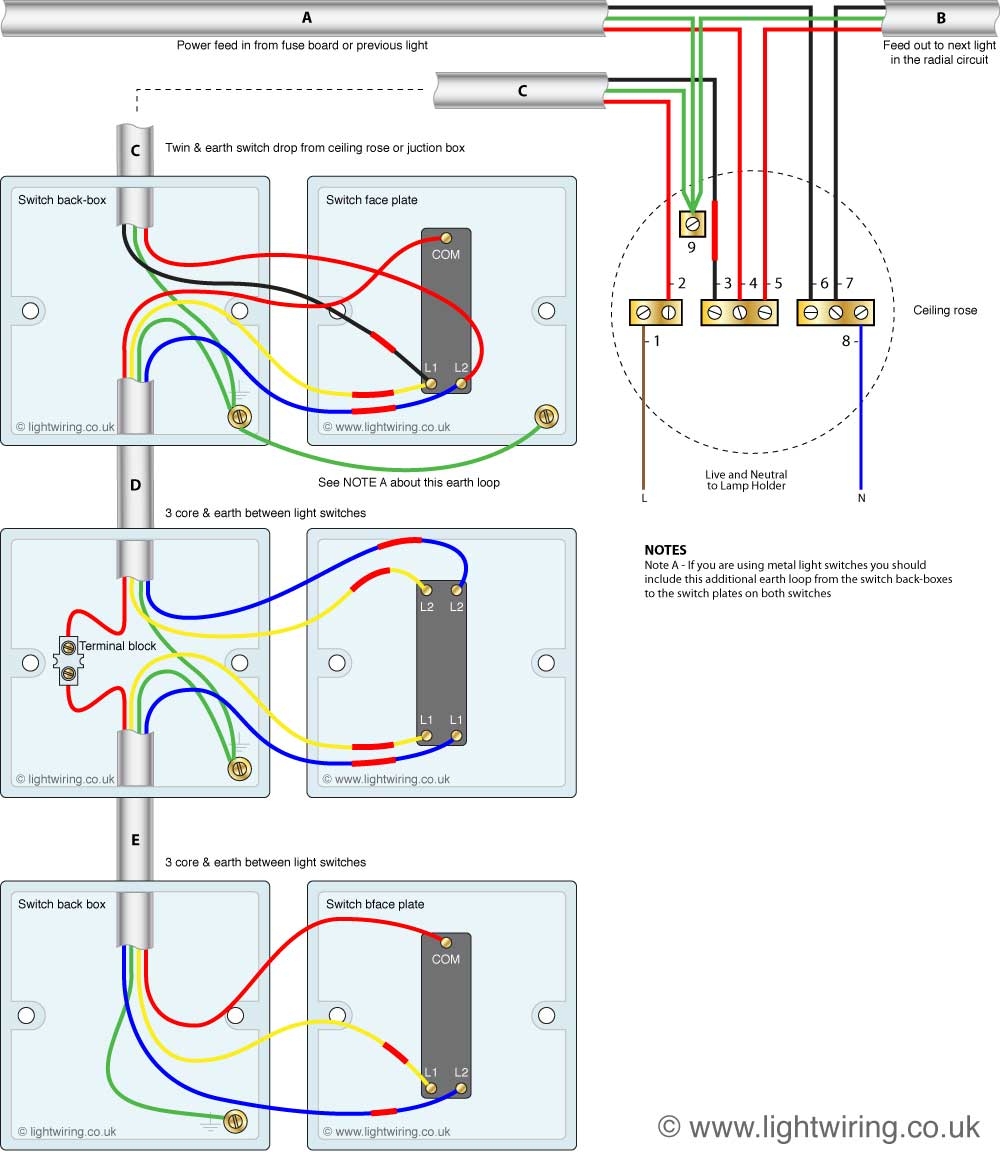
 How To Wire A 3 Way Switch Diagram For 12 Volt System (signalwires.com)
Start by turning off the power to the circuit at the breaker box. Then, identify the three terminals on each switch – the common terminal (usually black), and the two traveler terminals (usually brass). Connect the common terminal of one switch to the hot wire, and the common terminal of the other switch to the light fixture.
Next, connect the two traveler terminals of each switch together using a 3 wire cable. The traveler wires are usually red and black, but can also be white or another color. Make sure to follow the diagram closely to ensure that you are connecting the wires correctly.
Once all the wires are connected, turn the power back on and test the switches to make sure they are working properly. If the lights do not turn on or off as expected, double check your wiring and make any necessary adjustments. With a little practice, wiring a 3 way switch diagram will become second nature.
Remember to always turn off the power before working on any electrical wiring, and if you are unsure about any part of the process, consult a licensed electrician. Safety should always be the top priority when working with electricity. Now that you have mastered the art of wiring a 3 way switch diagram, you can confidently tackle future electrical projects in your home.