When it comes to understanding the wiring diagram of a light switch, it is important to know the basic components involved in the process. A light switch is a simple device that is used to control the flow of electricity to a light fixture. Understanding how to wire a light switch can help you troubleshoot any issues with your lighting and make any necessary repairs.
Whether you are installing a new light switch or replacing an existing one, having a clear understanding of the wiring diagram is essential. It is important to follow safety precautions and turn off the power before working on any electrical wiring to prevent accidents or injuries.
 Two Switch Wiring Diagram (resolutionsforyou.com)
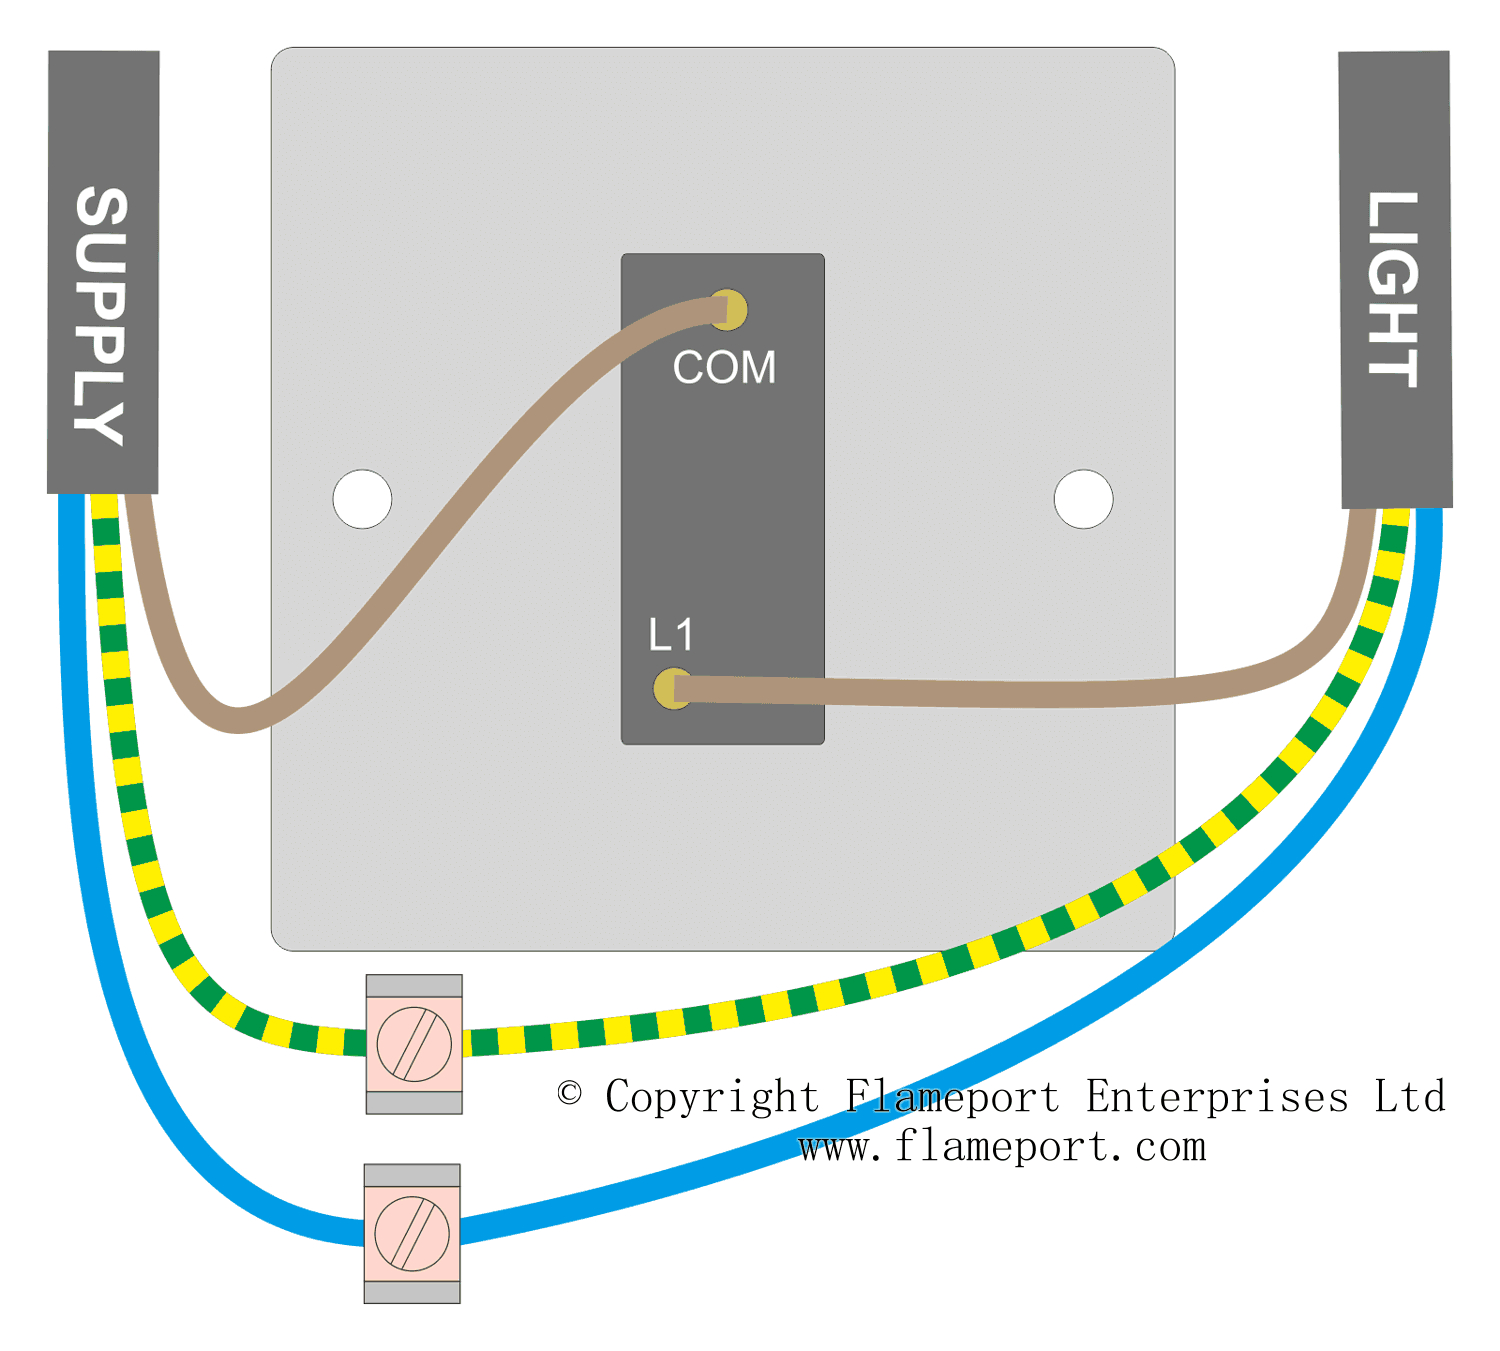
Here is a basic wiring diagram of a light switch:
1. Turn off the power: Before starting any electrical work, make sure to turn off the power to the circuit at the main electrical panel.
2. Remove the old switch: If you are replacing an existing light switch, carefully remove the cover plate and unscrew the switch from the electrical box.
3. Identify the wires: In a typical light switch setup, you will have a black wire (hot), a white wire (neutral), and a bare copper wire (ground). Make sure to identify each wire before proceeding with the installation.
4. Connect the wires: Connect the black wire to the brass screw terminal on the switch, the white wire to the silver screw terminal, and the bare copper wire to the green screw terminal. Make sure to tighten the screws securely to ensure a proper connection.
By following these basic steps and understanding the wiring diagram of a light switch, you can safely install or replace a light switch in your home. Remember to always consult a professional electrician if you are unsure about any aspect of the wiring process to ensure the safety of yourself and your home.