When it comes to installing a new thermostat in your home, it is important to understand the wiring diagram of the device. Honeywell thermostats are known for their reliability and user-friendly design, but proper installation is key to ensuring they work correctly.
Before you begin the installation process, it is crucial to have a clear understanding of the wiring diagram of the Honeywell thermostat you are using. This will help you to correctly connect the wires and avoid any potential issues down the line.
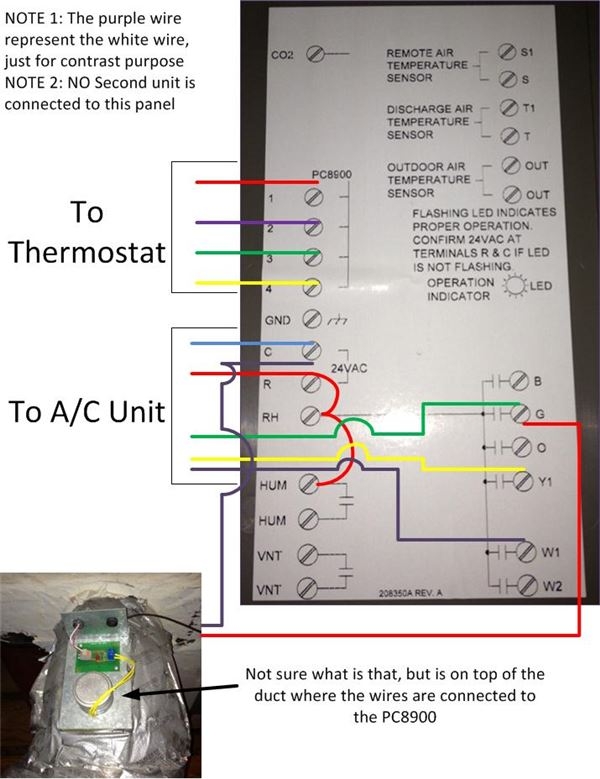
 Honeywell Thermostat Th3210d1004 Wiring Diagram (wiringall.com)
Typically, Honeywell thermostats come with a wiring diagram included in the packaging. This diagram will outline which wires should be connected to which terminals on the thermostat. It is important to follow this diagram carefully to ensure that the thermostat functions properly.
Commonly, Honeywell thermostats will have terminals labeled with letters such as R, W, Y, G, and C. Each of these terminals corresponds to a specific wire in your HVAC system. By following the wiring diagram provided, you can easily connect the wires to the correct terminals on the thermostat.
If you are unsure about how to interpret the wiring diagram or connect the wires to the thermostat, it may be best to consult with a professional HVAC technician. They will have the knowledge and experience needed to properly install the thermostat and ensure that it is functioning correctly.
In conclusion, understanding the wiring diagram of a Honeywell thermostat is essential for a successful installation. By following the diagram provided and connecting the wires to the correct terminals, you can ensure that your thermostat is working efficiently and effectively in your home.