When it comes to wiring a two way switch for a light, it can seem confusing at first. However, with the right knowledge and understanding of the process, it can be relatively simple to do. A two way switch allows you to control a single light from two different locations, making it convenient for larger rooms or hallways.
Before starting the wiring process, it is important to gather all the necessary tools and materials. This includes a screwdriver, wire stripper, electrical tape, and of course, the two way switch and light fixture. Make sure to turn off the power to the circuit before beginning any work to ensure safety.
 One Way Switch Diagram (www.chanish.org)
First, start by identifying the two switches that will control the light. One switch will be the “hot” switch, while the other will be the “load” switch. The hot switch is where the power source will come from, while the load switch is where the power will go to the light fixture.
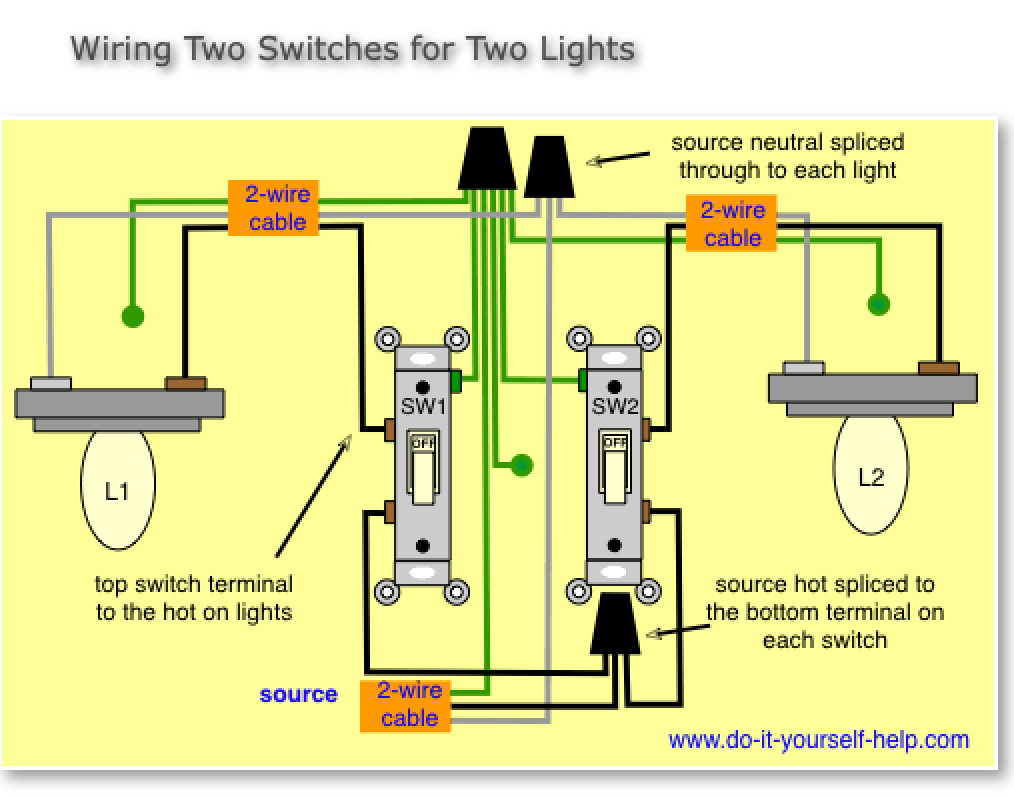
Next, connect the wires according to the diagram of the two way switch light wiring. The common terminal of the first switch should be connected to the power source, while the common terminal of the second switch should be connected to the light fixture. The two traveler terminals of each switch should be connected to each other.
After all the wires are connected, double-check the connections to ensure everything is secure and properly in place. Once everything is confirmed, turn the power back on and test the switches to make sure the light turns on and off from both locations.
Overall, wiring a two way switch for a light can be a straightforward process with the right guidance. By following the diagram and taking the necessary precautions, you can successfully install a two way switch for convenient lighting control in your home.