Extension cords are a common household item that many people use on a daily basis. They allow us to plug in multiple devices and appliances in different locations around our homes. However, it’s important to understand how to properly wire a 3 prong extension cord to ensure safety and prevent electrical hazards.
When it comes to wiring a 3 prong extension cord, the key is to follow the correct diagram to ensure that the grounding wire is connected properly. The grounding wire is essential for protecting you from electrical shocks and preventing damage to your devices.
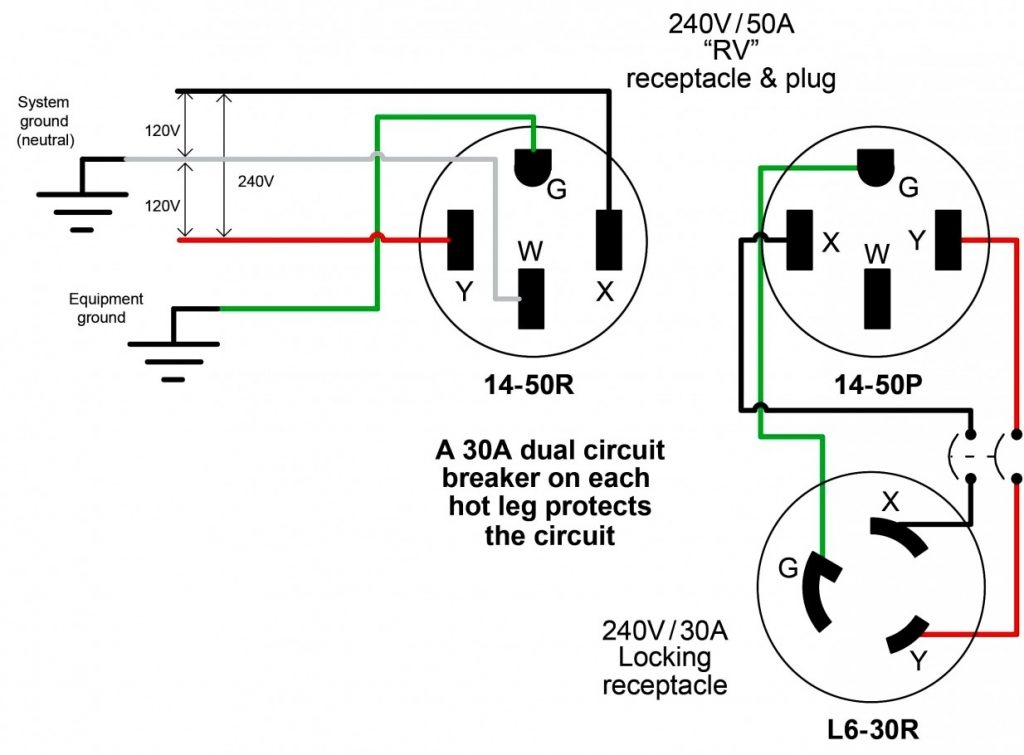
 3 Prong Extension Cord Wiring Diagram Wiring Diagram Pictures (schematron.org)
First, you will need to strip the insulation off the end of the extension cord to expose the three wires inside: the hot wire (usually black), the neutral wire (usually white), and the grounding wire (usually green or bare copper).
Next, you will need to connect the hot wire to the brass terminal screw, the neutral wire to the silver terminal screw, and the grounding wire to the green terminal screw. Make sure to tighten the screws securely to ensure a good connection.
Once you have connected all three wires to their respective terminal screws, you can then reassemble the plug by securing the casing and tightening any screws that hold it in place. It’s important to double check your connections before plugging in any devices to ensure everything is wired correctly.
In conclusion, understanding how to wire a 3 prong extension cord is essential for ensuring safety and preventing electrical hazards. By following the correct wiring diagram and making sure all connections are secure, you can safely use your extension cord for all your electrical needs.