When it comes to wiring a single light switch in your home, it’s important to understand the basic principles of electrical wiring. A single light switch is a simple device that allows you to turn a light on and off from one location. By following a wiring diagram, you can easily install a single light switch in your home.
Before you begin any electrical work, it’s important to turn off the power to the circuit you will be working on. This can be done by flipping the corresponding breaker in your electrical panel. Always use caution when working with electricity to ensure your safety.
 Two Switch Wiring Diagram (resolutionsforyou.com)
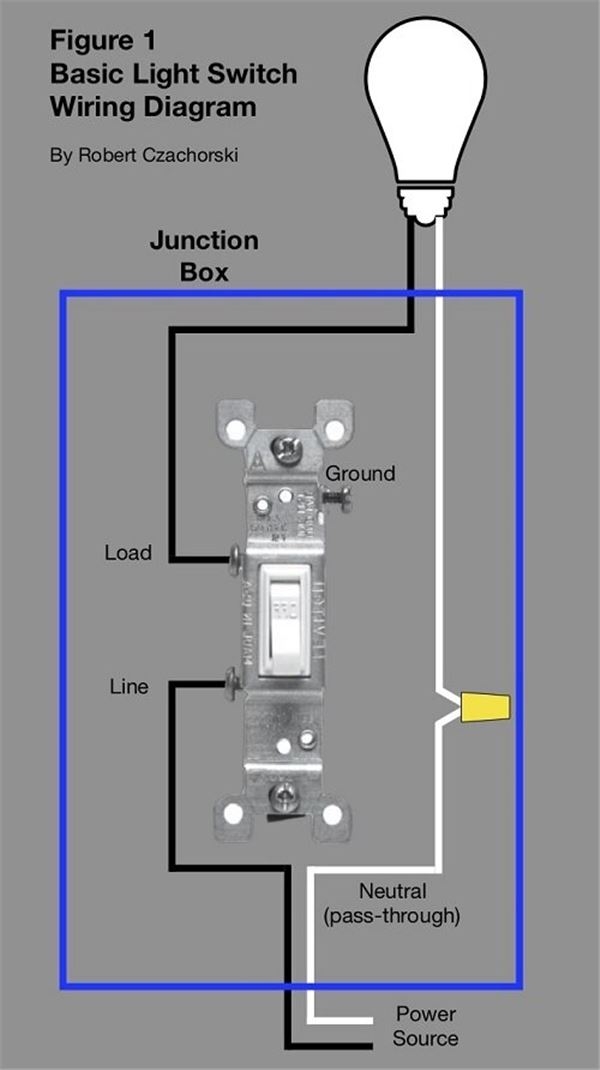
Single Light Switch Wiring Diagram
Here is a basic wiring diagram for a single light switch:
1. Turn off the power to the circuit and double-check that it is off using a voltage tester.
2. Remove the cover plate from the existing switch and unscrew the switch from the electrical box.
3. Disconnect the wires from the existing switch, making note of which wire is connected to each terminal (typically a black wire for the hot wire and a white wire for the neutral wire).
4. Connect the black wire from the circuit to the brass terminal on the new switch and the white wire to the silver terminal. If there is a ground wire, connect it to the green screw on the switch.
5. Secure the switch back into the electrical box, screw on the cover plate, and turn the power back on to test the switch.
By following this wiring diagram and these steps, you can easily install a single light switch in your home. Remember to always prioritize safety and consult a professional electrician if you are unsure about any part of the process.
In conclusion, wiring a single light switch is a straightforward process that can be accomplished with the right tools and knowledge. By following a wiring diagram and taking the necessary precautions, you can successfully install a single light switch in your home. Remember to always prioritize safety and consult a professional if needed.