When it comes to installing a 3 way switch in your home, Leviton offers a variety of high-quality products to make the process easy and efficient. A 3 way switch allows you to control a single light or set of lights from two different locations, making it a convenient option for rooms with multiple entry points.
Understanding how to wire a Leviton 3 way switch is essential for a successful installation. With the right wiring diagram, you can confidently tackle this project and enjoy the benefits of a well-lit space with convenient control options.
 Leviton 3 Way Switch Wiring Diagram Guide (schempro.com)
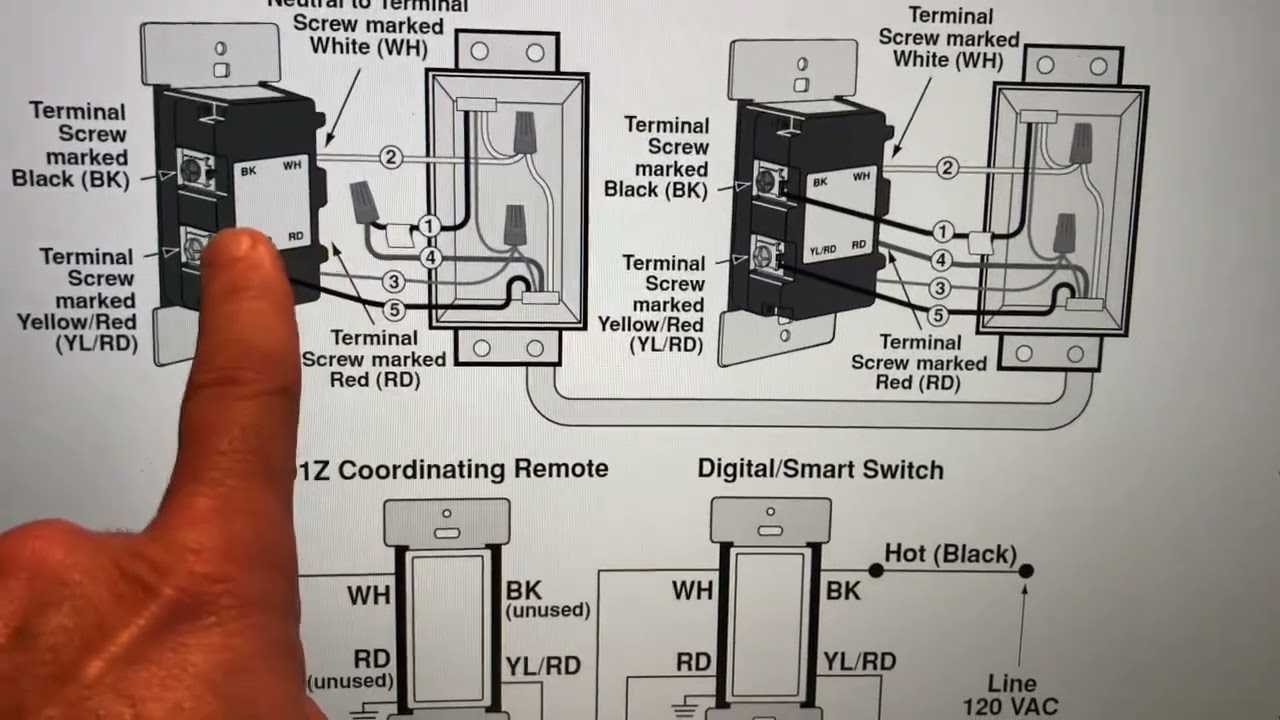
One common Leviton 3 way switch wiring diagram involves connecting the common terminal of one switch to the hot source, the common terminal of the second switch to the light fixture, and the traveler terminals of both switches to each other. This configuration allows for proper communication between the switches to control the light effectively.
It is important to follow the specific wiring instructions provided by Leviton to ensure a safe and functional installation. Taking the time to carefully plan and execute the wiring process will help prevent any issues or malfunctions down the line. Referencing a detailed wiring diagram can also help clarify any questions or concerns you may have during the installation process.
In conclusion, Leviton 3 way switch wiring diagrams are a valuable resource for anyone looking to install a 3 way switch in their home. By following the recommended wiring instructions and diagrams, you can confidently complete this project and enjoy the convenience of controlling your lights from multiple locations. With Leviton’s high-quality products and user-friendly instructions, you can easily upgrade your lighting system and enhance the functionality of your space.